Swedish Spice Cookies with Sous Pastry Chef Girl

2 1/4 cups all-purpose flour 2 tsp baking soda 1 tsp ground cloves 1 tsp ground cinnamon 1 tsp ground ginger 1 tsp salt 3/4 cup softened unsalted butter (1 1/2 sticks) 1 1/4 cups sugar, divided 1 large egg 1/4 cup molasses Preheat oven to 375 degrees. Line ungreased baking sheets with parchment paper. … Continue reading “Swedish Spice Cookies with Sous Pastry Chef Girl”

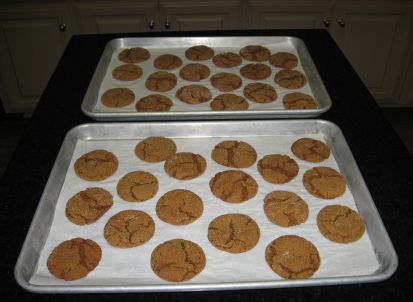
cookies%20-%20done.jpg

2 1/4 cups all-purpose flour
2 tsp baking soda
1 tsp ground cloves
1 tsp ground cinnamon
1 tsp ground ginger
1 tsp salt
3/4 cup softened unsalted butter (1 1/2 sticks)
1 1/4 cups sugar, divided
1 large egg
1/4 cup molasses

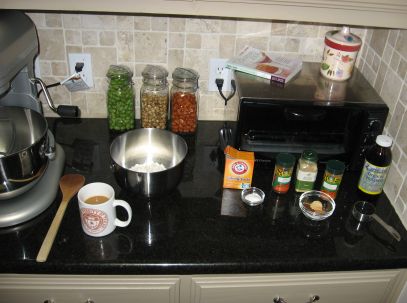
cookies%20-%20mise%20en%20place.jpg

Preheat oven to 375 degrees. Line ungreased baking sheets with parchment paper.

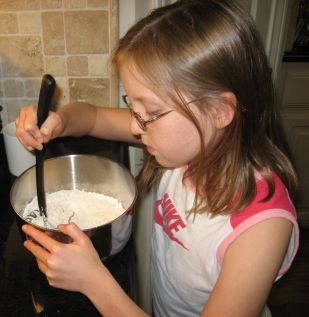
cookies%20-%20girl%20mixing%20dry%20ingredients.jpg

Sift together flour, baking soda, spices and salt; set aside.

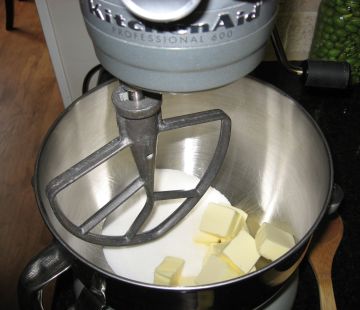
cookies%20-%20butter%20and%20sugar%20before%20creaming.jpg

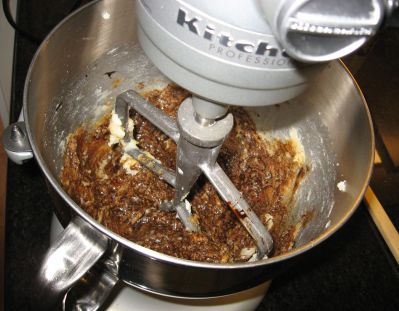
Beat butter and 1 cup of the sugar in large bowl of electric mixer on medium-high speed until light (about 1 minute). Add the egg and molasses; mix well.

cookies%20-%20butter%20sugar%20molasses%20egg.jpg

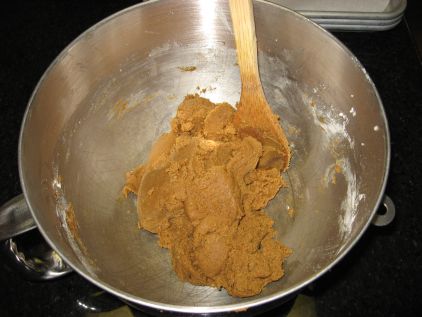
Stop the mixer and add the flour mixture. Mix just until combined.

cookies%20-%20completed%20dough.jpg

Using about 1 Tbsp. of the dough for each, roll the dough into balls.

cookies%20-%20girl%20forming%20dough%20balls.jpg

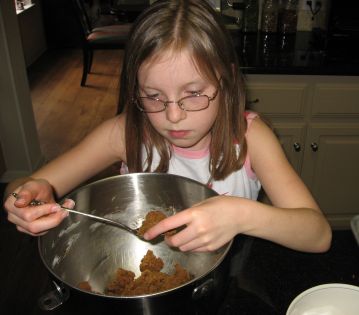
We use long iced tea spoons (heaping) to scoop the dough out of the bowl. It’s very important to make them all as close to the same size as possible, so that they will all cook at the same rate.

cookies%20-%20girl%20rolling%20dough%20balls.jpg

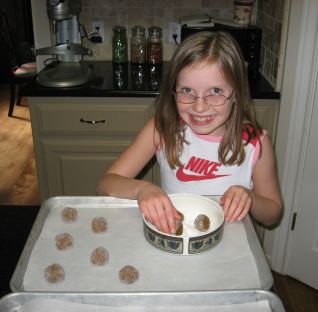
Roll in the remaining 1/4 cup of granulated sugar so that they are fully coated. Arrange on baking sheets, spaced about 2 inches apart. If you prefer a thin, crisp cookie, they may be flattened with a glass that has been dipped in sugar.

At our house, we prefer cookies that are crisp on the outside and chewy in the middle, so we do NOT do the glass-flattening step, but place them on the cookie sheets in “balls”. Watch the cookies carefully as they bake – you want them to just be starting to “crust” a little on the outside, but still be a little soft in the middle. It’s a very fine line, for these cookies, between “chewy/delicious” and “tough/scorched”. You want to pull them out of the oven before they start to darken too much. They will spread a bit as they bake and “crack” open on their tops.

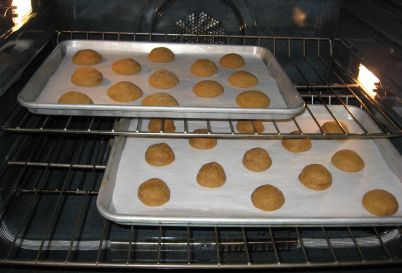
cookies%20-%20after%205%20minutes%20baking.jpg

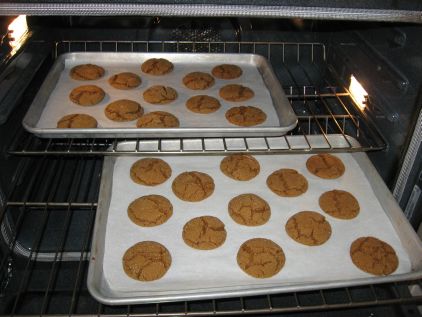
Bake until set (about 11 minutes). I bake two cookie sheets at a time, so I switch the sheets from the bottom oven rack to the top oven rack halfway through the baking time, so that they don’t get too well done on either the bottom or the tops of the cookies. If you bake one tray at a time and don’t do this little “switcheroo”, they will take less time (about 9 – 10 minutes) to bake in total, since the oven won’t be opened and have a chance to cool down.

cookies%20-%20after%2010%20minutes%20baking.jpg

Transfer cookies to a wire rack and let cool. Makes about 3 dozen. Store in an airtight container and eat them within one week.

These are a great spicy, winter-y cookie, but they are just as delicious in the summer (with lemonade) as they are in the winter (with a frosty glass of milk or hot cup of coffee for dunking). These make a great holiday gift, too.

girl%20with%20cookie.jpg

Mexican Vanilla Ice Cream

Dr. Agatston, of South Beach Diet fame (see my last post), says that the two WORST diet disasters that you can inflict upon yourself are beer and ice cream, so let me just make it clear right now that Hubby and I will NOT eat this. Well, I won’t eat it anyway. Hubby, however, has … Continue reading “Mexican Vanilla Ice Cream”

Dr. Agatston, of South Beach Diet fame (see my last post), says that the two WORST diet disasters that you can inflict upon yourself are beer and ice cream, so let me just make it clear right now that Hubby and I will NOT eat this. Well, I won’t eat it anyway. Hubby, however, has absolutely NO willpower when it comes to ice cream, so I bet he’ll have some. I’d feel guilty for tempting him, but he’s lost more weight than I have, so I can sabotage his diet just a little, right? The idea, though, is that this is for the kids. We have a ton of leftover Halloween candy around here and thought it might be fun to “smush” some into ice cream, like at our favorite ice cream place. I like to make my own ice cream, so that I can use organic milk, cream, eggs, etc. Some wonderfully thoughtful friends (Thanks J and D!!!) even brought us back some organic Mexican vanilla (the best in the world – really!) from their trip this summer. Making your own ice cream is MUCH simpler than you might think, it just requires a bit of pre-planning. You need to allow enough time for the custard to cool before freezing and also you need to remember to put your ice cream freezer cylinder in your freezer (most require 24 hours). This is a great dessert to make for a dinner party, though – make the custard ahead of time (morning of the party or even the day before) and have it chilled in the fridge, then just pour it into the ice cream maker. By the time the coffee’s ready, you have ice cream. Your guests will be very impressed!

Mexican Vanilla Ice Cream

1 cup milk
(we use lowfat and it turns out fine – yes, I used to be one of those people that would order a chili cheeseburger, onion rings and a diet Coke)
1/2 cup sugar (see note below)
2 large eggs
2 cups heavy whipping cream
2 tsp vanilla extract (Mexican, if possible)

Warm the milk over low heat in a medium-sized saucepan. Whisk the sugar and eggs together in a separate medium-sized bowl. Slowly pour the warm milk into the egg/sugar mixture, while continuing to whisk.

NOTE: This is VERY important and may require someone else to help pour while you stir. If you pour too quickly, without enough stirring, the warm milk will cook the eggs too quickly and the finished ice cream will taste like scrambled eggs. Blech!

Here is the egg/sugar/milk mixture as it starts to cook:
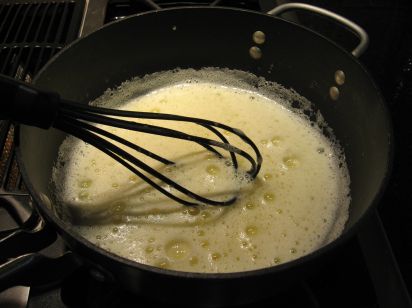
ice%20cream%20custard%20cooking.jpg

Pour the mixture back into the pan and heat it slowly until thickened, stirring constantly (until it looks like very liquid pudding). Do NOT let this come to a boil (see “scrambled egg” warning above).

Here’s the egg/sugar/milk mixture, once it’s reached the right consistency:
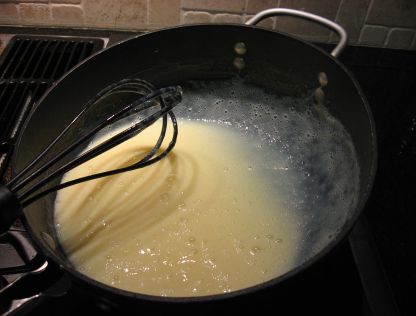
ice%20cream%20custard%20cooked.jpg

Remove from heat and let the custard cool to room temperature. Stir in the whipping cream and vanilla.

Here’s the custard, after adding the cream and vanilla:
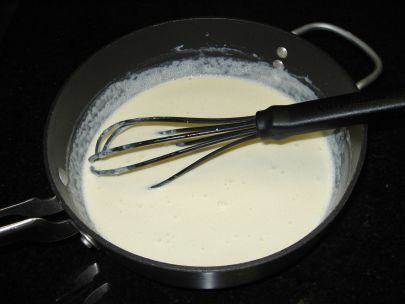
ice%20cream%20after%20adding%20cream%20and%20vanilla.jpg

Pour custard into a Tupperware-type container and chill until thoroughly cooled. Freeze in your ice cream maker, following the manufacturer directions. Top with your favorite crushed candy bar, toasted nuts, etc.

If you happen to feel like getting REALLY fancy (and happen to have an extra $2 or so on hand to buy a vanilla bean), you can cut 1 whole vanilla bean in half, then cut it open (lengthwise) and add it to your custard right before cooking it (after mixing the milk and the eggs/sugar). Let the vanilla bean sit in the custard as it cools. OMIT the vanilla extract if you do this. Right before freezing, remove the vanilla bean and scrape out all of the tiny seeds inside, discarding the outer bean pod afterwards. Then you’ll have “Vanilla Bean” ice cream, with the authentic little vanilla specks. This is Hubby’s favorite.

NOTE on sugar: I like to use organic cane sugar for most recipes. It’s organic, first of all, but it also has a richer, molasses/brown sugar taste, because it’s unrefined. It is darker and does have larger granules, though, so I wouldn’t recommend it for any recipe where the sugar doesn’t really have a chance to be heated/cooked enough to dissolve well. I would NOT use it for things like: meringue, sweetened whipped (Chantilly) cream or rimming a cocktail glass. You need finer, whiter sugar for that. But, I do love the cane sugar flavor for cookies, muffins, custards, adding to hot beverages, etc.

Here’s the ice cream, freezing in the machine:
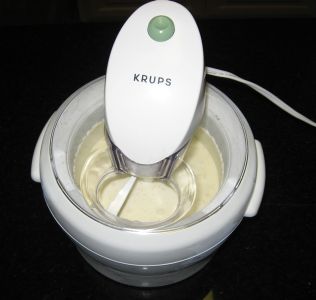
ice%20cream%20in%20freezer.jpg

Speaking of ice cream makers, have any of you ever used one of these?
I’m thinking of getting one for a friend’s children for Christmas. It looks like it would be really fun, even though it only makes a little bit of ice cream at a time.

Here’s the finished ice cream, in a storage container to finish freezing to serving consistency:
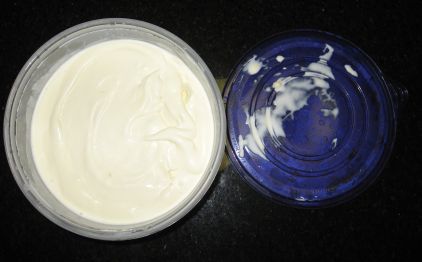
finished%20ice%20cream%20in%20storage%20container.jpg

Here it is, ready for serving, with the candy inside. Boy and Hubby put Reese’s in theirs, Girl chose a Crunch bar. The ice cream was still a little soft, but gets a little “harder” after it has been in the fridge overnight.
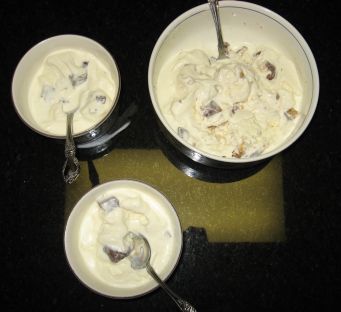
IMG_1669.JPG

Key Lime pie

I made another of the Key Lime pies. The kids were offended that they didn’t get to try it on Saturday, and I did have some of the coulis left, so, here it is. Yes, yes, I did, indeed write the Boy and Girl’s initials in Passion Fruit coulis. Sue me. The Girl LOVED this. … Continue reading “Key Lime pie”

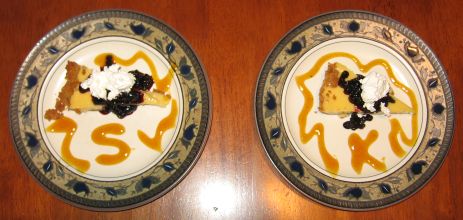
coulis.jpg

I made another of the Key Lime pies. The kids were offended that they didn’t get to try it on Saturday, and I did have some of the coulis left, so, here it is. Yes, yes, I did, indeed write the Boy and Girl’s initials in Passion Fruit coulis. Sue me.

The Girl LOVED this. The Boy felt cheated (he didn’t care for the blueberries) and wanted a Hershey bar (we’ve already bought our Halloween give-out candy). Oh, well….

Birthday Cupcakes

I think they turned out pretty cute! To make the recipe into cupcakes, put about 1/4 cup of batter in each cup (one batch will make 20 cupcakes) and cook for 15 – 18 minutes (you know the drill – until the toothpick comes out clean). I LOVE the Reynolds aluminum foil baking cups and … Continue reading “Birthday Cupcakes”

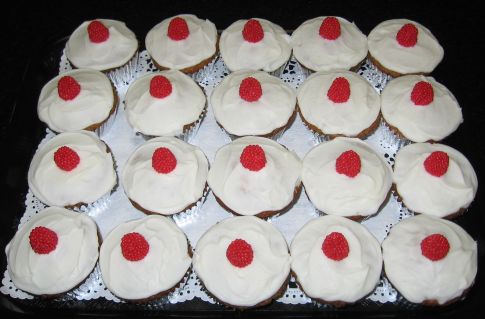
I think they turned out pretty cute! To make the recipe into cupcakes, put about 1/4 cup of batter in each cup (one batch will make 20 cupcakes) and cook for 15 – 18 minutes (you know the drill – until the toothpick comes out clean). I LOVE the Reynolds aluminum foil baking cups and won’t use anything else. Amazon has them if your local grocery store doesn’t carry them. The garnish is raspberry gummy candies from the bulk bin at Central Market.

Cupcakes.jpg

He liked it!

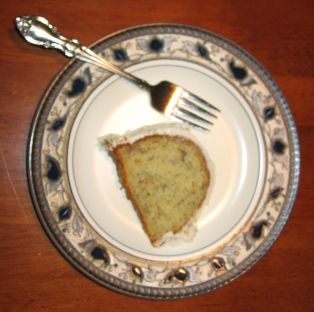
The banana cake was a hit, so it looks like I’ll be making cupcakes tomorrow. The girl, who is an avowed banana-hater, is looking over my shoulder and says that even SHE liked it!

The banana cake was a hit, so it looks like I’ll be making cupcakes tomorrow. The girl, who is an avowed banana-hater, is looking over my shoulder and says that even SHE liked it!

sliced%20banana%20cake.jpg

Banana Birthday Cake with Lemon Icing

The boy’s birthday was a couple of weeks ago, but he wanted a “surprise” party, so we’ve delayed the date a little to throw him off track. This cake is a “trial run”. If he likes it, I’ll make the recipe into cupcakes for his party (this Friday – shhhhh!). He LOVES bananas and is … Continue reading “Banana Birthday Cake with Lemon Icing”

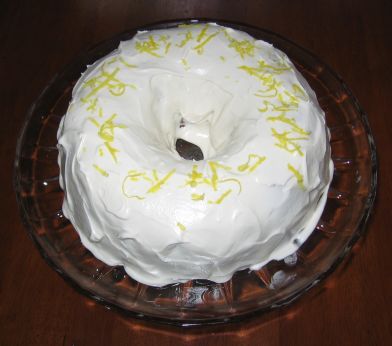
The boy’s birthday was a couple of weeks ago, but he wanted a “surprise” party, so we’ve delayed the date a little to throw him off track. This cake is a “trial run”. If he likes it, I’ll make the recipe into cupcakes for his party (this Friday – shhhhh!). He LOVES bananas and is not a fan of really gooey buttercream, so I thought this not-too-sweet cake with tangy icing glaze would be perfect. This is my mother’s recipe and was my favorite cake when I was a kid; I hope the boy likes it, too!
BananaCake.jpg

Banana Cake with Lemon Icing

for cake:
3/4 cup softened butter
1 1/2 cups sugar
2 eggs
1 tsp. salt
1 tsp. McCormick’s Vanilla Butter & Nut extract
1 cup mashed very ripe banana
1/2 cup buttermilk
1 tsp. baking powder
1 tsp. baking soda
2 cups flour

for icing:
1/4 cup softened butter
1 box (3 and 3/4 cups) powdered sugar
about 1/4 cup half and half (you can use milk, if you’d like, but I wanted the icing REALLY rich and white)
1 tsp. lemon extract
1 Tablespoon freshly grated lemon peel

Preheat oven to 350 degrees. Grease Bundt pan.

Prepare cake batter:
Cream butter and sugar together (I used my mixer). Add eggs and beat gently. Mix in bananas, buttermilk, salt, baking powder, baking soda, extract and then flour. Pour into Bundt pan. Bake for 30 minutes.

Cool cake in pan for 10 minutes then remove (turn over) gently from pan.

Prepare icing:
Cream butter, adding sugar slowly. Add half and half, a little at a time, adjusting amount as necessary to reach desired consistency. Add lemon extract. Spread/pour over cake. Sprinkle with lemon peel.