Sweet Potato Gnocchi, Volume 2

I made another batch of these gnocchi today. I didn’t cook the sweet potato as long as I did the first time (not intentionally), so when I went to mash it into the dough, it didn’t “mash” as evenly and smoothly as it did the first time and I was left with some small chunks … Continue reading “Sweet Potato Gnocchi, Volume 2”

I made another batch of these gnocchi today. I didn’t cook the sweet potato as long as I did the first time (not intentionally), so when I went to mash it into the dough, it didn’t “mash” as evenly and smoothly as it did the first time and I was left with some small chunks of sweet potato in the dough (see photo below). I’m sure they will end up fine, since they will be boiled before eating and the sweet potato will soften up, but the dough did require quite a bit of flour (3/4 cup?) to roll it out, when it didn’t require ANY the first time. So, if any of you decide to make these, make sure that your sweet potatoes are cooked VERY well – soft enough to mash smoothly without any lumps. It’s only a difference of a minute or two in the microwave, but it will make your life MUCH easier when you go to shape the gnocchi. It also seems to help to chill the dough in the fridge for a while (even overnight) before rolling it out. I did that last time, but did not do it this time. I also skipped the whole fork-rolling thing. It didn’t make any difference in how they tasted or how they cooked, and once they boiled and swelled a bit, you couldn’t see that little detail, anyway. I’ve also discovered that you should just ignore the recommended boiling time. Just boil them until they float to the top of the pan – that is the traditional (non-sweet potato) gnocchi cooking technique. It works fine for these, too, and is much easier than timing. They turn out just right this way. Girl helped me make these. We are freezing some of them and will try to pull them out and cook them tomorrow to see how they hold up to the freezer.
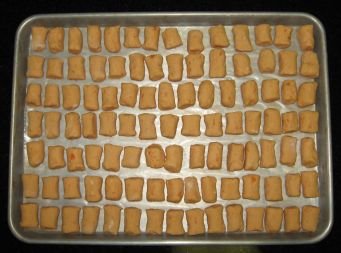
freezer%20gnocchi.jpg

A tray of gnocchi, ready to go in the freezer. I’m going to freeze them on the tray until they freeze solid, and then will transfer them to a big Ziploc bag. I’m planning to put them right in the boiling water, without thawing them first. Jennifer – I’ll let you know how they turn out!

Herb Roasted Pork Tenderloin with Sweet Potato, Apple & Sage Spoon Bread

This is a truly great recipe – I can’t recommend it enough. Thanks to Jennifer for reminding me about it – we haven’t made it in a while. This is my #1 gun in my recipe “arsenal”. Everyone that I have served this to has asked for the recipe. Kids love it, too. I’ve even … Continue reading “Herb Roasted Pork Tenderloin with Sweet Potato, Apple & Sage Spoon Bread”

HerbRoastedPorkTenderloin.jpg

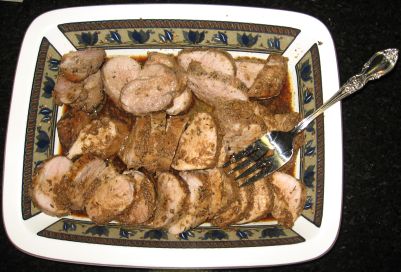
This is a truly great recipe – I can’t recommend it enough. Thanks to Jennifer for reminding me about it – we haven’t made it in a while. This is my #1 gun in my recipe “arsenal”. Everyone that I have served this to has asked for the recipe. Kids love it, too. I’ve even made the marinade up and frozen pork tenderloins IN the marinade, so that if I pull a tenderloin out of the freezer in the morning (or the night before is even better), then it can marinate while it thaws. Any leftovers are amazing in a sandwich the next day (with a little horseradish). This is also a great food to take to someone that has had a new baby, death in the family, has been ill, etc., since it’s so universally appealing. We have also taken this pork on a camping trip, with the meat frozen so that it would stay cool in the ice chest until the second camping night (our first night is always hot dogs, since we’re so busy setting up the campsite, tents, etc.). We wrapped the pork in foil and cooked it in the coals of our campfire. My father-in-law especially loves this and has even cooked it on the grill. Mmmmm…..

Herb-Roasted Pork Tenderloin (adapted from Southern Living)

1/4 cup soy sauce
1/4 cup Worcestershire sauce
1/4 cup vegetable oil
1 teaspoon dried thyme
1 teaspoon dried marjoram
1 teaspoon rubbed sage
1 teaspoon garlic powder
1 teaspoon onion powder
1 teaspoon ground ginger
1 teaspoon salt
1 teaspoon pepper
1 (1 1/2-pound) package pork tenderloins
(NOTE: if you are watching salt intake, you may either omit the salt or use low-sodium soy sauce, but I would not recommend doing both. This recipe is MUCH better with a tiny bit of salt.)

Stir together first 11 ingredients in a heavy-duty zip-top plastic bag. Prick pork with a fork, and place in marinade, turning to coat. Cover or seal; let stand at room temperature 30 minutes, or chill 2 hours or up to one day (longer is better). Place pork in a roasting pan. (The original Southern Living recipe instructed to remove the pork from the marinade and cook it on a rack, but I found that it’s MUCH more flavorful if you cook it with the marinade.)

Bake at 350° for 40 minutes or until a meat thermometer inserted into thickest portion registers 160° to 165°, depending upon your desired degree of doneness.

Slice tenderloin, spooning marinade over the top, or serving on the side. NOTE: Do NOT use marinade if you have not cooked the meat in it.

Yield: 8 servings

Sweet Potato, Apple and Sage Spoon Bread (click on title for recipe) This is another great Epicurious recipe.

Sweet%20Potato%20Spoon%20Bread.jpg

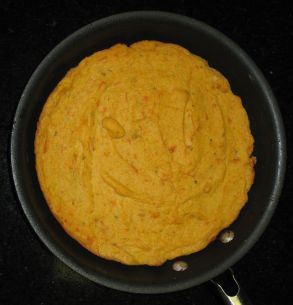
This was pretty yummy, fluffy, had a well-balanced flavor and was simple to make. Boy said he liked the consistency and said that it was a little like mashed potatoes, but Girl “didn’t care for it”. It has a really similar flavor to the Sweet Potato Gnocchi with Brown Butter and Sage, but not as rich. I guess that makes sense, because the two main ingredients (sweet potato and sage) are the same, except the gnocchi have a stick of butter melted over them! The cornmeal took much less time to absorb into the milk than the recipe instructed – I pretty much put the cornmeal in and it instantly “seized” and was absorbed into the milk. I did use lowfat (instead of whole) milk and yellow (instead of white) cornmeal, because that’s what I had on hand. I’m not sure that the apple added much to the flavor, so you could probably omit that and substitute a little more sweet potato (or just omit it altogether) without losing anything. I made a half-batch, since I didn’t need 10-12 servings, so it was only a half apple that I added, anyway.

Roasted Brussel Sprouts with Pancetta

These are the BEST brussel sprouts EVER. Even confirmed sprout-phobes will LOVE these! My kids are always excited when they know we’ve having these for dinner: “Yay! Brussel Sprouts!”. Honest. We love these for any extended-family gathering during “sprout season”: Thanksgiving, Christmas, New Year’s, etc. Mmmmmmm…….. Roasted Brussel Sprouts 2 pounds fresh Brussel sprouts, washed … Continue reading “Roasted Brussel Sprouts with Pancetta”

Brusselsprouts.jpg

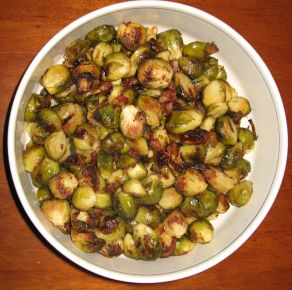
These are the BEST brussel sprouts EVER. Even confirmed sprout-phobes will LOVE these! My kids are always excited when they know we’ve having these for dinner: “Yay! Brussel Sprouts!”. Honest. We love these for any extended-family gathering during “sprout season”: Thanksgiving, Christmas, New Year’s, etc. Mmmmmmm……..

Roasted Brussel Sprouts

2 pounds fresh Brussel sprouts, washed and cut in half (remove any outer leaves that have evidence of bug bites or discoloration and cut rough bottom of stem off)

about 1/4 cup olive oil (or maybe less – you need JUST enough to lightly coat the sprouts so they don’t stick to the pan)

1 cup chopped pancetta (Italian bacon)

3 minced (or pressed) garlic cloves

about 1/4 cup balsamic vinegar (I like WHITE balsamic for this, since it doesn’t change the color of the sprouts as much as red balsamic, but either is great)

1 Tbsp. fresh thyme leaves (removed from woody stems)

salt and fresh ground pepper

Preheat oven to 450 degrees. Place brussel sprouts, garlic and pancetta in a very large baking pan (the biggest you have – I use a “half-sheet” cake pan). Drizzle olive oil over and then gently fold so that oil is evenly coating all sprouts. Sprinkle with salt and pepper (about 1/4 tsp salt and a little less pepper). Bake about 20 – 25 minutes, stirring about every 5 minutes, until sprouts are tender and bacon is crisped (sprouts will be lightly browned). Add thyme and vinegar. Stir and return to oven for 5 more minutes. Remove from oven. Stir one more time and serve.

Fall Greens with Pumpkin Vinaigrette and Jerked Pumpkin Seeds

We had a family dinner party last night to celebrate Hubby’s 40th birthday. Hubby requested Mangia’s Pizza (the Jeff’s Special is TO DIE FOR) and salad for the meal. I had some leftover Jerked Pumpkin Seeds from the Butternut Squash soup that I made recently and decided to come up with a salad that would … Continue reading “Fall Greens with Pumpkin Vinaigrette and Jerked Pumpkin Seeds”

We had a family dinner party last night to celebrate Hubby’s 40th birthday. Hubby requested Mangia’s Pizza (the Jeff’s Special is TO DIE FOR) and salad for the meal. I had some leftover Jerked Pumpkin Seeds from the Butternut Squash soup that I made recently and decided to come up with a salad that would work with them. This salad was a MAJOR hit – the guests loved it and there was absolutely not one bite left – a few guests even went back for seconds! This will make a HUGE batch (about 16 servings), so feel free to adjust quantities as necessary to suit your needs. Girl is a big onion fan, so she liked this salad better than Boy. The salad is is still pretty kid-friendly (apples, carrots, sweet peppers), though. If your kids aren’t fans of slightly spicy things, you might leave the pumpkin seeds out of the kid portions.

IMG_1358.JPG

Fall Greens with Pumpkin Vinaigrette and Jerked Pumpkin Seeds

For Salad:
1 pound of your favorite greens or lettuce mixture (the mix that I used had romaine, oak leaf, lolla rosa, tango, chard, mizuna, arugula, frisee and radicchio)
1 roasted red bell pepper, peeled, seeded and cut into slivers
1 large (or 2 small) Granny Smith apples, thinly sliced into bite-sized pieces
1 grated carrot (or about 8 baby carrots, grated)
1/2 small red onion, very thinly sliced into strips
3/4 cup shaved (use a veggie peeler) Parmesan
3/4 cup Jerked pumpkin seeds (see below)
1 batch Pumpkin Vinaigrette (see below)

Gently toss together all ingredients EXCEPT pumpkin seeds, Parmesan and vinaigrette. Pour vinaigrette over salad (you’ll probably need all of it) and gently toss again to coat. Sprinkle a little Parmesan and a few pumpkin seeds over each salad serving as it is plated. Pass remaining pumpkins seeds for anyone that likes their salad “extra crunchy” and would like more.

Pumpkin Vinaigrette

2 cloves garlic, minced or pressed
2 tsp. maple syrup
1 tsp. salt
1/2 tsp. freshly ground pepper
4 Tbsp. pumpkin puree
4 Tbsp. apple cider vinegar
8 Tbsp. extra-virgin olive oil

Combine all ingredients except the olive oil into a small bowl. Whisk well. Add olive oil and whisk until incorporated. Makes about 1 cup.

Jerked Pumpkin Seeds

3/4 cup raw pumpkin seeds
about 1/4 cup Jerk seasoning (see below)
1 and 1/2 Tbsp. melted butter

Pour the melted butter over pumpkin seeds, add the Jerk seasoning and stir. Bake at 250 degrees for about an hour, turning and stirring about every 15 minutes.

Jamaican Jerk Seasoning
This is Chef Jeff Blank’s recipe from his WONDERFUL book Cooking Fearlessly, I’ve just cut the quantities down some:

1/2 cup granulated sugar
6 Tbsp. garlic powder
2 Tbsp. salt
1 1/2 tsp. white pepper
1/2 tsp. allspice
1 1/2 tsp. dry mustard
6 Tbsp. onion powder
2 Tbsp. dried thyme
1 1/2 tsp. black pepper
1 1/2 tsp. cayenne
4 tsp. curry powder
1/4 tsp. ground clove

This seasoning can also be used as a rub on meats before smoking or grilling.
I also used it to make Jerked Cashews and Pecans recently for a great cocktail snack (follow the same instructions for making the Jerked Pumpkin Seeds).
IMG_1357.JPG

Basil-Lime Martini – This is not a “kid” recipe, I know, but this is the best cocktail EVER, so I had to share!

Basil-Lime Martini, adapted from Boston restaurant Via Matta’s recipe published in Food & Wine Cocktails 2006 . This is a great light, refreshing Summer drink. 3 large basil leaves 1 small basil leaf or a very small “cluster” of basil leaves for garnish 2 Tbsp freshly squeezed lime juice 5 Tbsp of your favorite vodka … Continue reading “Basil-Lime Martini – This is not a “kid” recipe, I know, but this is the best cocktail EVER, so I had to share!”

martini.jpg

Basil-Lime Martini, adapted from Boston restaurant Via Matta’s recipe published in Food & Wine Cocktails 2006 . This is a great light, refreshing Summer drink.

3 large basil leaves
1 small basil leaf or a very small “cluster” of basil leaves for garnish
2 Tbsp freshly squeezed lime juice
5 Tbsp of your favorite vodka (I recommend Tito’s.)
3 Tbsp water
3 Tbsp sugar

Simmer sugar and water together in a small saucepan until slightly thickened and just barely syrupy. Cool. Tear large basil leaves (reserve the small ones) lightly and add to sugar mixture. Muddle (smash) together until leaves are well bruised. (This is much easier if you have a “real” muddler, but you can also use a wooden spoon or potato masher, etc.) Add lime juice and vodka. Chill (with ice) in a martini shaker and strain into a pre-chilled martini glass. Add small basil leaf garnish.

I like to keep big batches (I think I’ve made a 20-batch before!) of this in the freezer, and pull them out when we have friends over. It lasts a long time in the freezer (remove basil leaves before freezing) and won’t freeze, so it can be poured straight from the freezer (shake first, because the lime juice and syrup will settle to the bottom).

I also like to keep a few petite martini glasses in the freezer, so they’ll be nice and frosty. I looked for a long time to find some that I really liked. They needed to be sturdy enough to go in the dishwasher and small enough to go in the freezer easily. I finally found these at a restaurant supply house – perfect! I did have to buy a whole case (3 dozen) of them, but we’ll be ready to go for our next big party!

Banana Birthday Cake with Lemon Icing

The boy’s birthday was a couple of weeks ago, but he wanted a “surprise” party, so we’ve delayed the date a little to throw him off track. This cake is a “trial run”. If he likes it, I’ll make the recipe into cupcakes for his party (this Friday – shhhhh!). He LOVES bananas and is … Continue reading “Banana Birthday Cake with Lemon Icing”

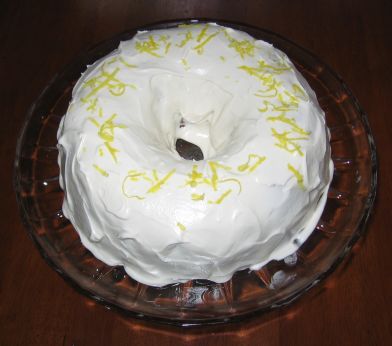
The boy’s birthday was a couple of weeks ago, but he wanted a “surprise” party, so we’ve delayed the date a little to throw him off track. This cake is a “trial run”. If he likes it, I’ll make the recipe into cupcakes for his party (this Friday – shhhhh!). He LOVES bananas and is not a fan of really gooey buttercream, so I thought this not-too-sweet cake with tangy icing glaze would be perfect. This is my mother’s recipe and was my favorite cake when I was a kid; I hope the boy likes it, too!
BananaCake.jpg

Banana Cake with Lemon Icing

for cake:
3/4 cup softened butter
1 1/2 cups sugar
2 eggs
1 tsp. salt
1 tsp. McCormick’s Vanilla Butter & Nut extract
1 cup mashed very ripe banana
1/2 cup buttermilk
1 tsp. baking powder
1 tsp. baking soda
2 cups flour

for icing:
1/4 cup softened butter
1 box (3 and 3/4 cups) powdered sugar
about 1/4 cup half and half (you can use milk, if you’d like, but I wanted the icing REALLY rich and white)
1 tsp. lemon extract
1 Tablespoon freshly grated lemon peel

Preheat oven to 350 degrees. Grease Bundt pan.

Prepare cake batter:
Cream butter and sugar together (I used my mixer). Add eggs and beat gently. Mix in bananas, buttermilk, salt, baking powder, baking soda, extract and then flour. Pour into Bundt pan. Bake for 30 minutes.

Cool cake in pan for 10 minutes then remove (turn over) gently from pan.

Prepare icing:
Cream butter, adding sugar slowly. Add half and half, a little at a time, adjusting amount as necessary to reach desired consistency. Add lemon extract. Spread/pour over cake. Sprinkle with lemon peel.

“Krispie” Cinnamon Chip French Toast

Breakfast this morning – a hit with the kids, probably because of the novelty (“You put WHAT on the french toast, Mom?!”). Once I convinced the nut-hating girl child that “those brown things” on top were Rice Krispies and NOT nuts, she loved it. The “never met a nut he didn’t love” boy child looked … Continue reading ““Krispie” Cinnamon Chip French Toast”

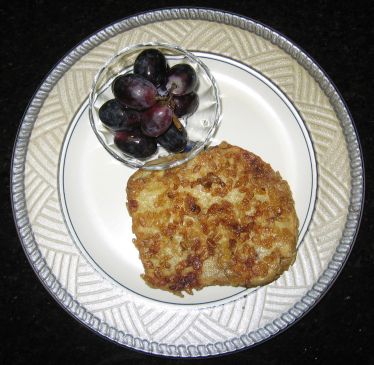
Breakfast this morning – a hit with the kids, probably because of the novelty (“You put WHAT on the french toast, Mom?!”). Once I convinced the nut-hating girl child that “those brown things” on top were Rice Krispies and NOT nuts, she loved it. The “never met a nut he didn’t love” boy child looked a little disappointed that they WEREN’T nuts, but still gobbled his up. Hmmm…..mental note: nut-crusted french toast would probably be pretty darned good, too! This dish is inspired by the Crunchy French Toast at Norma’s restaurant in New York. I used the new Organic Rice Krispies (what will they think of next?). Cooking it in REAL butter is a MUST. Delectable flavor and fun, crunchy texture. The boy likes his with syrup; the girl likes powdered sugar on hers instead. At Norma’s, they make it with brioche and serve it with warm caramel sauce. Mmmmmm……..

KrispieFrenchToast-small.jpg

Krispie Cinnamon Chip French Toast
(makes 1 serving for a hungry adult, 2 servings for kids or less-hungry adults)

2 slices Great Harvest Cinnamon Chip bread
about 1 cup Rice Krispies cereal
2 eggs
splash of milk (1/8 cup?)
1/4 tsp. McCormick Vanilla Butter & Nut extract
(I LOVE this extract and use it in all kinds of things. It’s a little hard to find, but definitely worth the effort.)
1/4 cup butter

Whisk eggs, extract and milk together in a shallow bowl (must be large enough to fit bread slices inside it). Place cereal in another shallow bowl of the same size. Place one of the bread slices in the egg mixture. Allow to sit about 30 seconds, then turn over to soak other side. Remove from egg and place bread in cereal bowl, turning to coat both sides with cereal. Heat half the butter in a large skillet over medium-low heat until melted and starting to bubble, but not brown. Add the egg/cereal-coated bread to the skillet, adjusting heat as necessary. This French toast needs to be cooked at a slightly lower temperature than regular French toast, or the butter and cereal will get too brown while the bread is still soggy inside. Repeat breading procedure for second bread slice and add to pan. Turn to cook other sides of bread when cereal is golden brown. Add the other half of butter, as needed, during cooking. When both sides are golden brown, remove from skillet. Serve with syrup or powdered sugar, your choice!