My mother’s “Jailhouse” Rolls

jailhouse%20rolls.jpg

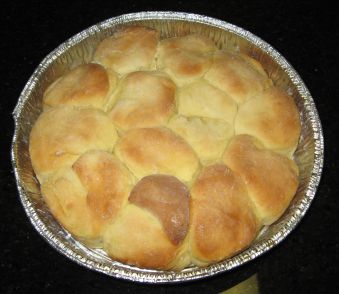
My mother used to be an assistant district attorney in Beaumont, Texas. The county jail was in the same building, a few floors above. The jail cafeteria made these rolls regularly (at least when the grand jury was in session, I don’t think they made them for the prisoners), and they smelled so good while my mother was at work that she had to ask for the recipe. They are a holiday MUST for our family now. My mother and I used to make pans and pans of them to give as teacher gifts at Christmas and it would be unthinkable to have a meal with the extended family without them. My kids (and Hubby, and my dad) go CRAZY for them. They are rich, moist, yeasty and YUMMY. My mother insists that using margarine (instead of butter) and instant mashed potatoes (instead of “real” ones) provides a lighter texture. That does go against my real/slow/whole food philosophy, but I must admit that I wouldn’t change a thing about the way these rolls taste, so she must be right.

“Jailhouse” Rolls

1 cup mashed potatoes (reconstituted instant ones recommended)
2 sticks margarine
3 eggs
7 cups flour
1 cup sugar
1 1/2 cups lukewarm water
1 package dry yeast
1 scant teaspoon salt

Mix yeast in water; blend and set aside. Mix potatoes, eggs, margarine, sugar and salt. Add flour. Add yeast water. Mix. Place in a greased bowl and cover with a cool, damp cloth. Refrigerate for 2 hours. Remove from refrigerator. Roll dough out to about 3/4 inch thickness and cut with a biscuit cutter. Place in buttered pans (8″ round cake pans work well). Brush the tops with melted butter and let rise for several hours. Bake at 450 degrees for 10 – 15 minutes until lightly browned on top.

Cinnamon Roll Version
(too delicious for a description to do them justice – just trust me)

1 recipe prepared Jailhouse Roll dough

for cinnamon rolls:
1/4 cup margarine, melted
1/4 cup sugar
1/4 cup brown sugar
1 tsp. cinnamon
1/2 cup chopped pecans (optional, unless you’re making them for me)
1/2 cup golden raisins (optional)

for icing:
2 cups powdered sugar
2 Tbsp margarine
1/2 tsp vanilla
2 or 3 Tbsp milk

Prepare dough as above. Divide dough in half after removing from the refrigerator. Roll each dough half into a large rectangle. Brush each rectangle with melted butter. Sprinkle each with a mixture of the sugar, brown sugar and cinnamon. Add chopped pecans and/or golden raisins to each rectangle, if desired. Roll rectangle into a log. Cut into 3/4 inch slices and place in a buttered pan. Let rise for several hours. Bake at 450 degrees for 15 minutes. Let rolls cool in pan. Mix together powdered sugar and butter in the food processor. Add vanilla and milk. Drizzle over cinnamon rolls and DEVOUR.


Orange Slice Cookies

cookies%20-%20completed.jpg

My favorite desserts are ones that have fruit in them, especially citrus. I will bypass ANYTHING made of chocolate for a good, homemade lemon square or lemon meringue pie. I know that makes me a bit of an oddity amongst most chocolate-crazed females, but I am definitely partial to citrus. I will post my ALL TIME FAVORITE dessert sometime soon (Saucy individual Lemon Puddings – with a crunchy “brulee” topping). My best friend (I love you, Eileen!) made those for me for my birthday one year and I’ve never been happier! So, as unique and citrusy as these cookies are, they are a really nice change from all of the gingerbread and sugar cookies that are around at this time of year, or are a great cookie to round out the assortment on a cookie tray or in a cookie gift box. This recipe was torn out of a magazine that I found so many years ago that I don’t even remember which one it was. The copy of the page that I have is so torn up that I can’t even read the name anymore, so I will apologize now to whichever publication I am about to blatantly plagiarize. This recipe is SO good and the finished cookies are so pretty – these are a sure-fire winner. the powdered sugar in the dough gives them a nice, crispy texture, almost like a “sandie” cookie. I only make these at Christmas, so every year I have to go and hunt to find the recipe. I am thrilled that I will now (thanks to this blog) be able to effortlessly find the recipe every year from now on.
Orange Slice Cookies

Makes about 80.
Prep. time: about 20 minutes
Freezing time: at least 30 minutes
Baking time: about 13 minutes

Dough:
2 sticks (1 cup) butter, softened
1 1/2 cups powdered sugar
1 Tbsp. freshly grated orange peel
(I always end up using clementine tangerines, because that’s what we have around at this time of year)
2 tsp. vanilla extract
1 tsp. baking powder
1 large egg
2 1/2 cups all-purpose flour

Icing:
2 1/2 cups powdered sugar
1 Tbsp. freshly grated orange (or clementine) peel
(For the icing, I grate the orange peel and then chop it finely, so that it doesn’t get clogged in the tip of my pastry bag. This is not necessary for the peel that goes in the cookie dough.)
3 Tbsp. fresh orange (or clementine) juice
1 cup orange-colored sugar
(check a craft store or cake decorating store if your supermarket doesn’t have this)

For the dough:
1. With mixer on medium speed, beat butter, sugar, orange peel, vanilla and baking powder until fluffly. Beat in egg. Reduce speed to low; gradually add flour, beating just until blended.
2. Divide dough in half.

cookies%20-%20dough%20in%202%20logs.jpg

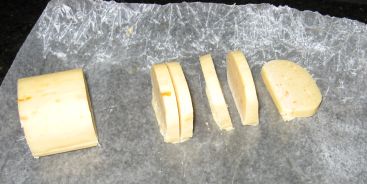
Shape each half into a 10-inch log. Press down on each log to flatten 1 side completely. Wrap and freeze at least 30 minutes, until firm enough to slice.
3. Heat oven to 325 degrees.
4. Cut 1 log at a time into forty 1/4 inch thick slices; place 1 inch apart on ungreased baking sheet (I usually line the sheets with parchment paper).

cookies%20-%20dough%20log%20sliced.jpg

5. Bake for 11 to 13 minutes, until very lightly browned. (I find that these usually take the whole 13 minutes to be lightly browned on the bottoms, and sometimes more.) Remove to wire rack to cool completely. Repeat with remaining dough.

For the icing:
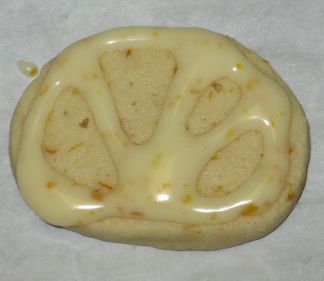
6. In medium bowl, whisk ingredients, until thick and smooth. Place in quart sized ziptop bag (or you may use a pastry bag with a small, round tip, like an Ateco #5). Pour colored sugar into a bowl. Snip tip off 1 corner of ziptop bag; pipe icing on cookies to resemble orange slices.

cookies%20-%20iced%2C%20not%20sugared.jpg

Gently press cookies, icing side down, in colored sugar. Shake off excess.

cookies%20-%20girl%20dipping%20cookie.jpg

Update:  I found a link to the recipe online:

http://www.grouprecipes.com/63830/fancy-orange-slice-cookies.html/print

Creamy Wild Rice Soup

A friend from Minnesota gave me this recipe about 15 years ago. It’s one of our favorites when soup (cold) weather arrives. We’re still waiting (sigh) for soup weather in Texas this year, but we’re enjoying our soup, anyway, even if we’re wearing shorts while we eat it! Boy especially likes this soup. It is … Continue reading “Creamy Wild Rice Soup”

WildRiceSoup.jpg

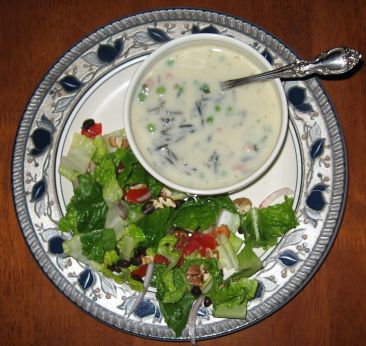
A friend from Minnesota gave me this recipe about 15 years ago. It’s one of our favorites when soup (cold) weather arrives. We’re still waiting (sigh) for soup weather in Texas this year, but we’re enjoying our soup, anyway, even if we’re wearing shorts while we eat it! Boy especially likes this soup. It is a great first course, if served in very small cups, or add a salad and some bread and make a meal of it! The salad pictured above was an odd mixture of romaine hearts, black beans, purple onion, chopped tomato and chopped, toasted pecans with sun-dried tomato vinaigrette. I have a tendency to throw whatever I have in the fridge on top of a salad. Sometimes they turn out great (like this one), but sometimes they’re just weird. If I had it to do again, I would have left either the pecans or the beans out – they weren’t a good combination, but not awful….

Wild Rice Soup

1/4 cup minced onion
4 Tbsp butter
1/3 cup flour
4 cups chicken broth
1/2 cup frozen green peas or grated fresh carrot
(I usually use carrots, but didn’t have any today, so I used peas)
1/2 cup cubed ham
2 1/2 cups cooked wild rice (I cook it with chicken broth, for extra flavor)
2 Tbsp. chopped fresh Italian parsley
2 cups milk
salt and pepper to taste

Saute the onion in the butter until soft. Turn heat off and whisk in the flour until well blended. Gradually pour in the chicken stock, whisking to incorporate. Cook over low heat, stirring occasionally, until very slightly thickened (5 – 10 minutes?). Add peas or carrots, ham, rice and parsley. Stir to combine and cook over low heat for 5 more minutes or so. Gradually pour in as much milk as necessary to reach the proper soup consistency (you may need slightly more or less than 2 cups). Simmer 2 or 3 more minutes to allow the soup to warm through. Salt and pepper to taste.

If you’re feeling like REALLY rich soup you can substitute half-and-half for some (or even all) of the milk, but we like a slightly lighter flavor so that we can make a meal of this. I would only make it with all cream if you are planning to serve VERY small portions.

Other possible variations:

Add a little finely diced celery (about 1/4 cup?) to the onion. Saute the celery with the onion and proceed with the recipe as usual.

Add some sliced or chopped, sauteed mushrooms (about 1 cup?) to the soup when you add the rice and ham.

Substitute chopped, cooked chicken for the ham.

Basic Buttercream Icing

This icing can be adapted to be used for almost anything. It’s great for cakes, cupcakes and even cookies, if they don’t need to be stacked or wrapped (this icing really won’t “harden” enough for that). I made this batch of icing to go with the cookies for Girl’s school Christmas party tomorrow (see previous … Continue reading “Basic Buttercream Icing”

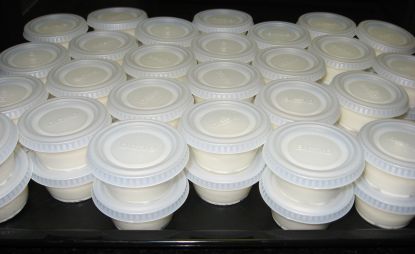
icing%20in%20cups.jpg

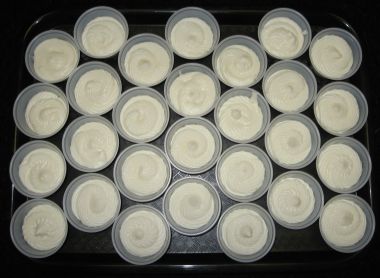
This icing can be adapted to be used for almost anything. It’s great for cakes, cupcakes and even cookies, if they don’t need to be stacked or wrapped (this icing really won’t “harden” enough for that). I made this batch of icing to go with the cookies for Girl’s school Christmas party tomorrow (see previous post – I made the cookies a few days ago and froze them). I thought that it would be easier for the kids to grab icing and decorate their own cookies if the icing was already portioned out, so I used these handy plastic portion cups. Even though they are not as environmentally friendly as I would like, I know that it will make it much easier at the party (and more hygienic), instead of having to scoop out enough icing for each kid and hoping that there will be enough left for the last kid.

icing%20with%20lids.jpg

Basic Buttercream Icing

1 stick (1/2 cup) butter, cut into chunky cubes
1 pound (1 box) powdered sugar (sifted, if there are any visible lumps)
1 tsp. extract of your choice
about 1/4 cup liquid of your choice
(more about extract and liquid choices later)
pinch of salt, optional
1 Tbsp. Meringue powder (I like Wilton brand, but any powdered egg whites will do. This is also optional, but does help the icing maintain it’s consistency.)

Cream butter lightly in a stand mixer until it is slightly softened and not lumpy. Add extract, meringue powder and salt, if desired. With mixer on low, pour powdered sugar in slowly until blended (mixture will be sort of coarse and crumbly). Add liquid gradually (1 Tbsp. at a time), until icing reaches the consistency that you want.

One batch makes a little more than 2 cups. You probably need a double batch of icing to frost one round two-layer cake or one batch of cookies. For a batch (24) of cupcakes, you could maybe get by with a single batch if you frost them lightly (my preference, anyway). If you are using this to frost cookies, keep in mind that the icing will stay soft, so the cookies cannot be stacked or easily stored, but it’s great for parties where the cookies will be eaten as soon as they are frosted and it’s much tastier than most typical cookie frosting.

A note on flavoring (extracts and liquids) choices:
I usually start with 1 tsp. vanilla extract and add just a touch (1/4 tsp.) of almond extract, too, but you can use any extract that you like (peppermint, lemon, etc.). For the holidays, mixing vanilla and peppermint extracts together is a festive flavor. If you want your icing to stay super WHITE, you can buy special clear extracts at a cake store or craft store. REAL vanilla extract tastes MUCH better, though, and I don’t think that having your icing stay WHITE WHITE matters, unless you’re making a wedding cake! If you really want WHITE icing, you have to use shortening, anyway, instead of the butter (ICK!). As far as liquid goes, I usually use milk, but if you want a really rich icing, you can use half-and-half or even whipping cream. If using cream, the icing will need to be refrigerated afterwards; if you use milk, the frosted cake/cupcakes can sit out for a day or two (covered) without you having to worry. If it will not be consumed before then, I would refrigerate it, just to be safe. This icing can also be easily adapted to make chocolate frosting – just add about 1/4 cup melted chocolate before adding the liquid. I usually use chocolate chips just to make it easy. To make a nice “grown-up” mocha-flavored icing, you can make chocolate icing, using strongly brewed, black coffee as your liquid in the icing, instead of milk.

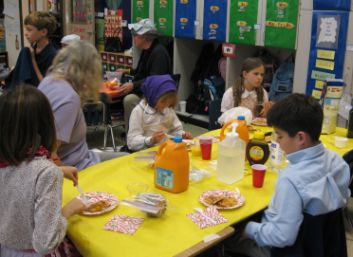
Just in case any of you are wondering what I did to help with Boy’s Christmas party, it was yesterday and I was there, helping make pancakes on an electric skillet and serving them to the kids. They have been studying Jamestown and had a Colonial-themed party. They dressed in pseudo-Colonial garb (this was much more exciting to the girls than the boys), made clove-studded orange pomanders, practiced calligraphy, made yarn dolls and played Colonial games. We called the pancakes “johnny cakes”. It was very festive and fun.

What’s really funny is that Boy is now fascinated with making more yarn dolls. He put together a couple more after school today. When Girl was in 3rd grade (and they did this same EXACT party), she made lots more yarn dolls, too. She made little beds for them and experimented with creating different ways to make their hair. Boy, on the other hand, is creating elaborate yarn trapezes in his room for them to swing from to catch their little yarn adversaries. Amazing how different the genders can be, even with the same toy. When Boy was very small, I didn’t believe in these gender stereotypes and bought both of the kids little doll strollers. It seems pretty silly now, but I was convinced that he should be allowed to play with dolls, too, if he wanted to. I needn’t have bothered – he was absolutely NOT interested. Girl used her doll stroller to push her baby dolls around, lovingly covering them with teeny little blankets. Boy used his stroller, too – to make it easier to cart his toy cars around from to room.

pancake%20eaters.jpg
Some of Boy’s friends, eating pancakes

colonial%20games.jpg
Boy (in the green sweater vest) playing “Colonial games”

All-Purpose Sugar Cookies

Girl’s class at school is having a Christmas party this week and they requested some cookies for the kids to decorate with frosting and sprinkles during the event. This recipe is JUST the thing. All-Purpose Sugar Cookies 2 cups (4 sticks) butter 3 cups sugar 1 tsp. baking soda 1 tsp. vanilla extract 3 beaten … Continue reading “All-Purpose Sugar Cookies”

baked%20cookies.jpg

Girl’s class at school is having a Christmas party this week and they requested some cookies for the kids to decorate with frosting and sprinkles during the event. This recipe is JUST the thing.

All-Purpose Sugar Cookies

2 cups (4 sticks) butter
3 cups sugar
1 tsp. baking soda
1 tsp. vanilla extract
3 beaten eggs
6 cups flour
1/4 to 1/2 tsp. McCormick’s Vanilla Butter & Nut extract (if you can find it), optional
tiny pinch of salt

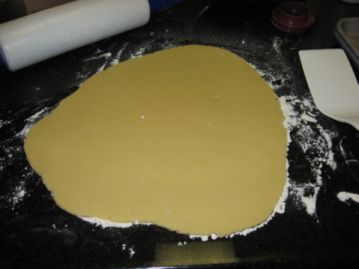
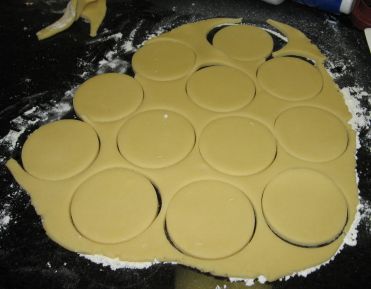
Preheat oven to 350 degrees. Cut sticks of butter into chunky cubes. Cream together butter and sugar in large bowl of a stand mixer. Add eggs, soda, and extracts. Mix until just barely blended. Blend in half of flour until just barely mixed. Repeat with remaining flour. Roll dough out to about 1/4 inch thickness and cut into desired shapes.

cookie%20dough%20rolled%20out.jpg

cut%20cookie%20dough.jpg

Decorate, if desired, with M & Ms, Red Hots, raisins, etc. If you are planning to serve them as “plain” sugar cookies, you may sprinkle them with a bit of coarse sugar (raw sugar or sanding sugar – you could even use plain white sugar if you don’t have either of these on hand) at this point. Bake about 10 minutes, depending upon size of cut-outs.

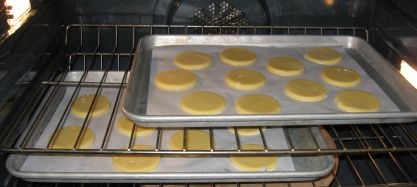
cookies%20in%20oven.jpg

Watch carefully, because these will become overdone very quickly. Makes about 5 dozen cookies that are about 3 and 1/2 inches across (plus one small little ball of dough to make one special mini-cookie for Boy).

Other ideas to use dough:

Chocolate Chip cookies:
Mix chocolate chips into dough before baking for a lighter cookie (no brown sugar).

Snickerdoodles:
Form dough into small balls and roll in cinnamon-sugar before baking.

Decorative Edge cookies:
Roll dough into a log about 2 inches across. Wrap in waxed paper and refrigerate until firm. Cut log into slices about 1/2 inch thick. Roll edge of slices in decorative sprinkles (jimmies, colored sugar, etc.) and bake as usual.

Kiss cookies:
Roll dough into small balls and then press an unwrapped Hershey Kiss candy into each ball before baking.

Iced, decorated cookies:
Decorate with your favorite icing and/or sprinkles after baking. I will post spreadable icing and poured fondant icing recipes soon. I am planning to make another batch of these soon, for the Christmas holidays and will likely pipe designs in multiple colors on them. Look for another entry soon. Here is a photo of some angel cookies that I made like this last year:

Sleepovercookieangels2.jpg

Hash Brown Breakfast Casserole

This is a great, old-fashioned, back-of-the-box kind of recipe, but it’s actually quite yummy and is great for cold mornings when you want a hearty breakfast. It’s a super recipe for when you have company staying with you and you need to make an easy breakfast for a crowd. Add a fruit salad, some OJ, … Continue reading “Hash Brown Breakfast Casserole”

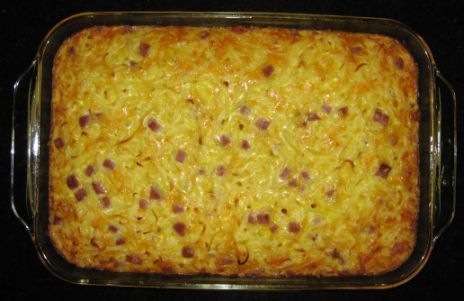
baked%20casserole.jpg

This is a great, old-fashioned, back-of-the-box kind of recipe, but it’s actually quite yummy and is great for cold mornings when you want a hearty breakfast. It’s a super recipe for when you have company staying with you and you need to make an easy breakfast for a crowd. Add a fruit salad, some OJ, (maybe some muffins or bagels, if your crowd isn’t too carb-conscious) and you’re all set!

breakfast%20girls.jpg
Girl and her cousin enjoying some casserole

Hash Brown Breakfast Casserole

3 cups water
2 packages boxed, dried hash brown potatoes (see note below)
3 cups shredded cheddar cheese (mild or sharp, your choice)
2 cups milk
10 beaten eggs
2 cups chopped, smoked ham (see note below)
1 cup thinly sliced green onion (see note below)

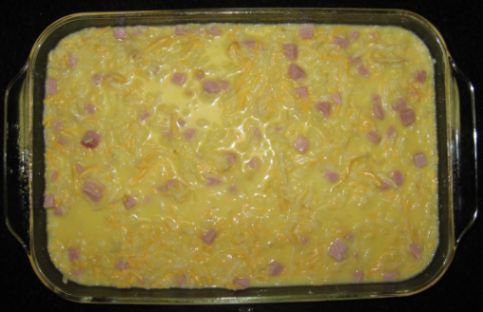
Heat oven to 350 degrees. Mix all ingredients in a large bowl. Pour into an ungreased 13 X 9 inch pan. Spread to make sure that potatoes, ham and cheese are evenly distributed in liquid.

uncooked%20casserole.jpg
Casserole, ready to go in the oven

(At this point, casserole can be covered with plastic wrap and refrigerated overnight, if desired. Pull out of the refrigerator and bake as usual the next morning. This is what we always do on Christmas morning – the casserole cooks as the kids empty their stockings.)

Bake, uncovered, until a knife inserted in the center comes out clean (about 60 minutes or maybe a TAD more) and the top is lightly browned. Let stand for about 2 minutes before cutting into serving pieces. This recipe can easily be halved (bake in a small square dish – 8 X 8 or so).

Note on hash browns:
I use B*tty Cr*cker brand – they’re a little hard to find, but I think Safeway/Randall’s/Von’s carries them pretty regularly. They will be next to the boxed, scalloped potatoes mix (ick!). Try Giant, if you’re on the East coast.

Note on ham:
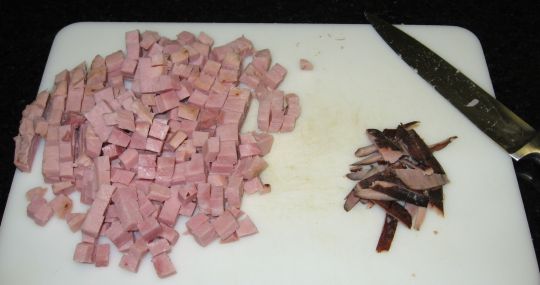
When you buy the ham from your store’s deli, have them cut it REALLY thick, tell them “for cubing” or “chef salad style”. Bring it home and cut the dark “rind” off of it, then cut the ham into 1/2 inch strips, then cut the other direction, into 1/2 inch dice. Feed the rind to your dog, if you have one. He will LOVE you for it. I like nitrite-free Black Forest ham. It’s expensive, but if you watch for it to go on sale, you can cut it up and freeze it. 3/4 lb. will yield about 2 cups chopped, with a little bit left over after you remove the rind. Save any that you have left over to toss into a Denver omelet later (or a frittata, of course!). Watch for more great recipes soon that also use this thick-cut chopped ham: Baked Homemade Mac and Cheese with Ham and Peas and Wild Rice Soup with Ham.

ham%20being%20chopped.jpg
Chopping ham, removing rind

Note on green onions:
I wasn’t able to find any green onions yesterday that looked decent. They all looked old and slimy, so I’m leaving them out this morning. It’s really better with the green onions in it, but I’ve left them out before (if the kids have a buddy to sleep over and I’m not sure if the buddy likes them) and it’s OK. Of course, when I heard the news of the great “Green Onion E-coli Panic of Ought-6”, I was glad that I hadn’t purchased any.

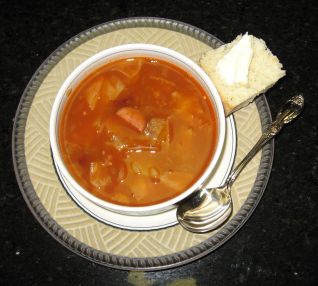
Portugese Soup from The Inn at Brushy Creek

We are having a BIG cold snap here today, so it’s perfect weather for soup. I made this for dinner tonight. This recipe is from a now-closed restaurant called the Inn at Brushy Creek that used to be in Round Rock, just north of where I live. This soup was always the first course, served … Continue reading “Portugese Soup from The Inn at Brushy Creek”

p.%20soup%20-%20finished%20in%20bowl.jpg

We are having a BIG cold snap here today, so it’s perfect weather for soup. I made this for dinner tonight. This recipe is from a now-closed restaurant called the Inn at Brushy Creek that used to be in Round Rock, just north of where I live. This soup was always the first course, served in small bowls. It’s so hearty, though, that we just serve it in big bowls and make a meal out of it. It is SO easy to make, your house smells terrific while it’s cooking and it’s VERY kid-friendly (it’s got ketchup in it!). I’m going to go here and pick up a nice loaf of something yummy to go with it. Their Spinach Feta bread is delicious, but it does have high fructose corn syrup it it (their Honey Whole Wheat does not).

Portugese Soup from the Inn at Brushy Creek

2 white onions, chopped
6 cloves garlic, chopped or pressed
6 Tbsp. olive oil
1 pound garlic-flavored, smoked pork sausage, cut into bite-sized pieces
(Elgin sausage is great, if you happen to live nearby and can get it, or Linguica)
10 cups beef stock
2 cans kidney beans, with liquid
1 head green cabbage, cored and chopped into medium pieces
12 small new potatoes, scrubbed and quartered
1/4 to 1/2 cup vinegar (less to taste)
1 16-ounce bottle ketchup (more to taste)
salt and pepper to taste

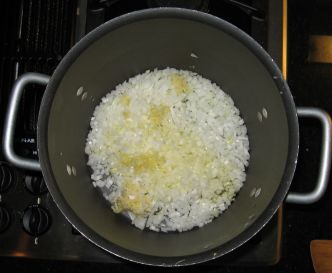
Saute onions and garlic in oil.
p.%20soup%20-%20onions%20garlic%20in%20pot.jpg

When they are just transparent, add sausage slices and brown lightly.
p.%20soup%20-%20onion%20garlic%20sausage.jpg

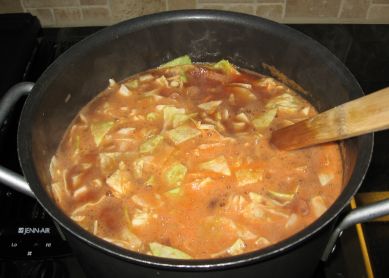
Add beef stock and all other ingredients.
p.%20soup%20-%20other%20ingredients%20added.jpg

Bring to a boil, stirring often to keep the bottom of the pan from burning. Reduce heat, simmer 35 – 45 minutes or longer, stirring occasionally. Correct seasonings to taste. Yields about 1 gallon. Share this with your neighbors – because of the potatoes, this soup will NOT freeze well, but it will keep in the fridge for a couple of days.

Grandma Louise’s Fudge

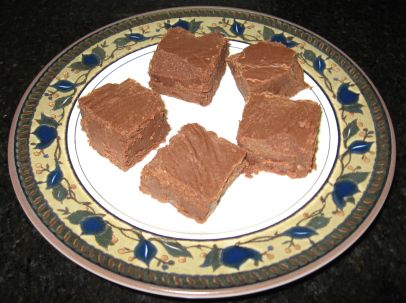
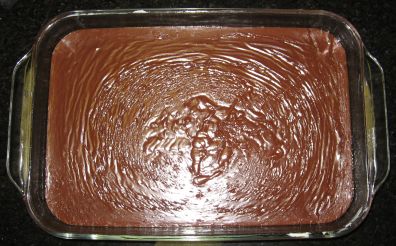
This fudge recipe is SUPER rich and delicious – very sinful. It’s VERY easy to make and makes a great holiday gift. My dad is absolutely powerless to resist this stuff. It was his mother’s recipe, but she passed away 11 years ago, so I make it for him every once in a while now. … Continue reading “Grandma Louise’s Fudge”

fudge%20on%20plate.jpg

This fudge recipe is SUPER rich and delicious – very sinful. It’s VERY easy to make and makes a great holiday gift. My dad is absolutely powerless to resist this stuff. It was his mother’s recipe, but she passed away 11 years ago, so I make it for him every once in a while now. It can be frozen for surprisingly periods of time without much ill effect. This should not be made on a rainy or very humid day – it won’t “set” properly.

I made this batch without nuts, at the special request of Girl, who is not a fan of most nuts. The nuts are optional, but it’s really much better with pecans in it. If you do add the nuts, though, make SOME effort to secure decent ones – the Planters in the bag from the supermarket will absolutely NOT do. Get good ones, even if you have to special-order them. There are lots of things that I do NOT like about living in Texas, but one of the good things is that we are able to secure really good pecans. My grandparents (on my mom’s side) are my “suppliers” and always seem to know a great local source. Thanks, Granny and Pappaw! I love you!

Grandma Louise’s Fudge

1/3 cup butter
1 can evaporated milk
(The original recipe says a 14 1/2 ounce can, but they don’t make those anymore, so I just use one 12 ounce can, plus a couple of ounces from another can to make 14 1/2 ounces. Any milk that you have left over is really yummy whisked into scrambled eggs before cooking – about 1 Tbsp. per egg.)
1 12-ounce package semisweet chocolate chips
4 1/2 cups sugar
13 ounces German’s brand sweet baking (green box) chocolate
(Again, 13 ounces is an odd amount. That’s 3 boxes, plus one or two extra squares. The recipe would probable be fine if you just used 12 ounces, but I haven’t tried it myself.)
2 teaspoons vanilla
1/2 tsp. salt
2 cups chopped pecans (optional, but recommended)
1 cup marshmallow cream (in a jar)

Butter a 13 X 9 inch (preferably glass) baking pan. Combine sugar, salt, butter and milk in a large pan sauce pan. Bring to a boil over low to medium heat and boil for 5 1/2 minutes, adjusting heat if necessary, to keep mixture from scorching. Remove from heat and add all other ingredients, except nuts. Beat/stir until well mixed. Stir in nuts, if desired. Pour into buttered pan. Let cool until solid, then cut into small square (about 1 1/2 inches on a side) pieces. Can be microwaved for a short time in a small container (coffee cup?) until melted to use for hot fudge ice cream sauce, if desired. Mmmmm……

fudge%20in%20pan.jpg

Swedish Spice Cookies with Sous Pastry Chef Girl

2 1/4 cups all-purpose flour 2 tsp baking soda 1 tsp ground cloves 1 tsp ground cinnamon 1 tsp ground ginger 1 tsp salt 3/4 cup softened unsalted butter (1 1/2 sticks) 1 1/4 cups sugar, divided 1 large egg 1/4 cup molasses Preheat oven to 375 degrees. Line ungreased baking sheets with parchment paper. … Continue reading “Swedish Spice Cookies with Sous Pastry Chef Girl”

cookies%20-%20done.jpg

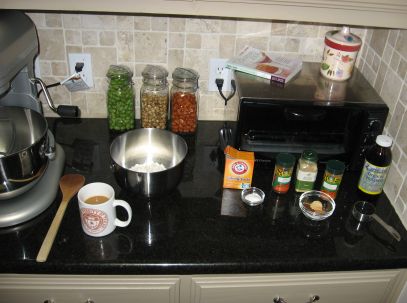
2 1/4 cups all-purpose flour
2 tsp baking soda
1 tsp ground cloves
1 tsp ground cinnamon
1 tsp ground ginger
1 tsp salt
3/4 cup softened unsalted butter (1 1/2 sticks)
1 1/4 cups sugar, divided
1 large egg
1/4 cup molasses

cookies%20-%20mise%20en%20place.jpg

Preheat oven to 375 degrees. Line ungreased baking sheets with parchment paper.

cookies%20-%20girl%20mixing%20dry%20ingredients.jpg

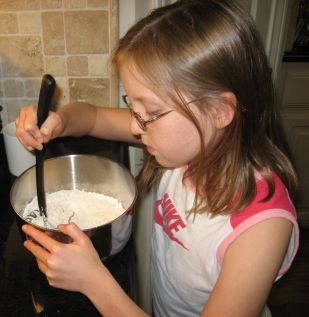
Sift together flour, baking soda, spices and salt; set aside.

cookies%20-%20butter%20and%20sugar%20before%20creaming.jpg

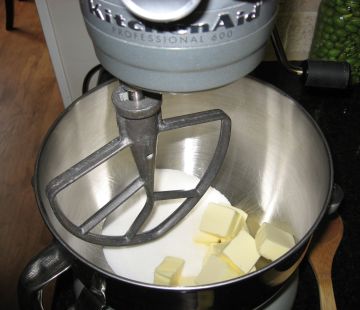
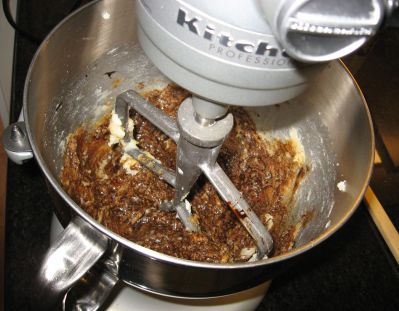
Beat butter and 1 cup of the sugar in large bowl of electric mixer on medium-high speed until light (about 1 minute). Add the egg and molasses; mix well.

cookies%20-%20butter%20sugar%20molasses%20egg.jpg

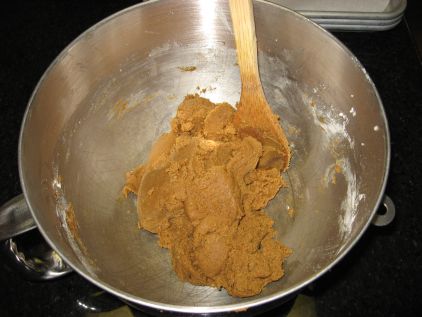
Stop the mixer and add the flour mixture. Mix just until combined.

cookies%20-%20completed%20dough.jpg

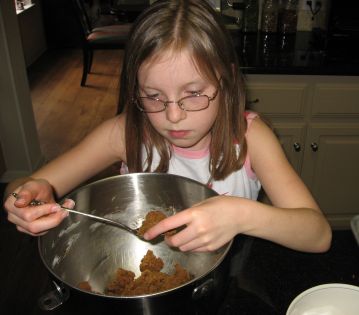
Using about 1 Tbsp. of the dough for each, roll the dough into balls.

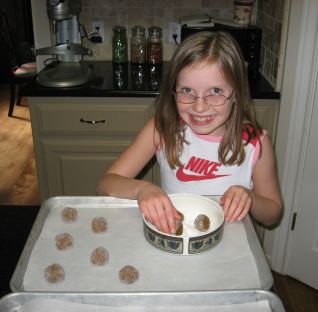
cookies%20-%20girl%20forming%20dough%20balls.jpg

We use long iced tea spoons (heaping) to scoop the dough out of the bowl. It’s very important to make them all as close to the same size as possible, so that they will all cook at the same rate.

cookies%20-%20girl%20rolling%20dough%20balls.jpg

Roll in the remaining 1/4 cup of granulated sugar so that they are fully coated. Arrange on baking sheets, spaced about 2 inches apart. If you prefer a thin, crisp cookie, they may be flattened with a glass that has been dipped in sugar.

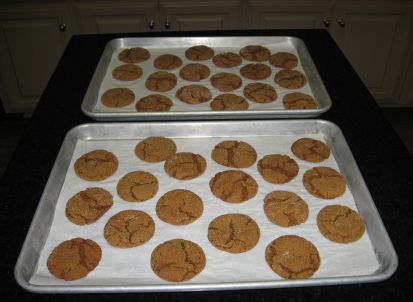
At our house, we prefer cookies that are crisp on the outside and chewy in the middle, so we do NOT do the glass-flattening step, but place them on the cookie sheets in “balls”. Watch the cookies carefully as they bake – you want them to just be starting to “crust” a little on the outside, but still be a little soft in the middle. It’s a very fine line, for these cookies, between “chewy/delicious” and “tough/scorched”. You want to pull them out of the oven before they start to darken too much. They will spread a bit as they bake and “crack” open on their tops.

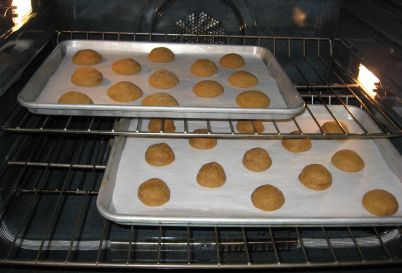
cookies%20-%20after%205%20minutes%20baking.jpg

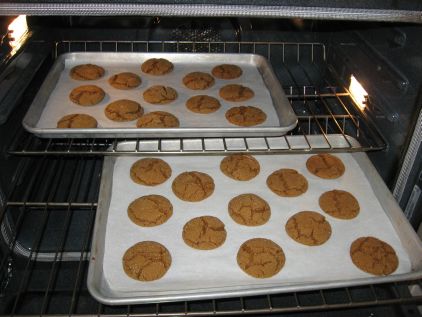
Bake until set (about 11 minutes). I bake two cookie sheets at a time, so I switch the sheets from the bottom oven rack to the top oven rack halfway through the baking time, so that they don’t get too well done on either the bottom or the tops of the cookies. If you bake one tray at a time and don’t do this little “switcheroo”, they will take less time (about 9 – 10 minutes) to bake in total, since the oven won’t be opened and have a chance to cool down.

cookies%20-%20after%2010%20minutes%20baking.jpg

Transfer cookies to a wire rack and let cool. Makes about 3 dozen. Store in an airtight container and eat them within one week.

These are a great spicy, winter-y cookie, but they are just as delicious in the summer (with lemonade) as they are in the winter (with a frosty glass of milk or hot cup of coffee for dunking). These make a great holiday gift, too.

girl%20with%20cookie.jpg

Mexican Vanilla Ice Cream

Dr. Agatston, of South Beach Diet fame (see my last post), says that the two WORST diet disasters that you can inflict upon yourself are beer and ice cream, so let me just make it clear right now that Hubby and I will NOT eat this. Well, I won’t eat it anyway. Hubby, however, has … Continue reading “Mexican Vanilla Ice Cream”

Dr. Agatston, of South Beach Diet fame (see my last post), says that the two WORST diet disasters that you can inflict upon yourself are beer and ice cream, so let me just make it clear right now that Hubby and I will NOT eat this. Well, I won’t eat it anyway. Hubby, however, has absolutely NO willpower when it comes to ice cream, so I bet he’ll have some. I’d feel guilty for tempting him, but he’s lost more weight than I have, so I can sabotage his diet just a little, right? The idea, though, is that this is for the kids. We have a ton of leftover Halloween candy around here and thought it might be fun to “smush” some into ice cream, like at our favorite ice cream place. I like to make my own ice cream, so that I can use organic milk, cream, eggs, etc. Some wonderfully thoughtful friends (Thanks J and D!!!) even brought us back some organic Mexican vanilla (the best in the world – really!) from their trip this summer. Making your own ice cream is MUCH simpler than you might think, it just requires a bit of pre-planning. You need to allow enough time for the custard to cool before freezing and also you need to remember to put your ice cream freezer cylinder in your freezer (most require 24 hours). This is a great dessert to make for a dinner party, though – make the custard ahead of time (morning of the party or even the day before) and have it chilled in the fridge, then just pour it into the ice cream maker. By the time the coffee’s ready, you have ice cream. Your guests will be very impressed!

Mexican Vanilla Ice Cream

1 cup milk
(we use lowfat and it turns out fine – yes, I used to be one of those people that would order a chili cheeseburger, onion rings and a diet Coke)
1/2 cup sugar (see note below)
2 large eggs
2 cups heavy whipping cream
2 tsp vanilla extract (Mexican, if possible)

Warm the milk over low heat in a medium-sized saucepan. Whisk the sugar and eggs together in a separate medium-sized bowl. Slowly pour the warm milk into the egg/sugar mixture, while continuing to whisk.

NOTE: This is VERY important and may require someone else to help pour while you stir. If you pour too quickly, without enough stirring, the warm milk will cook the eggs too quickly and the finished ice cream will taste like scrambled eggs. Blech!

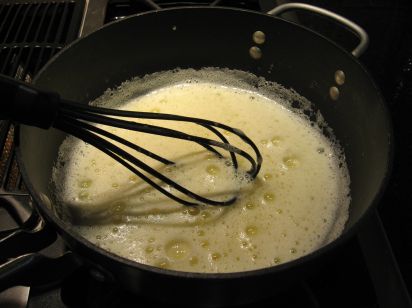
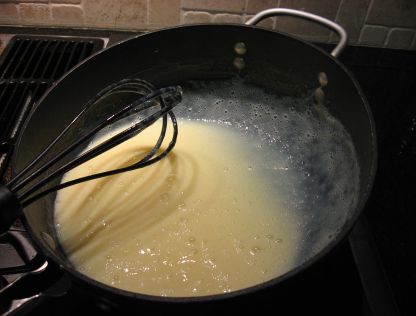
Here is the egg/sugar/milk mixture as it starts to cook:
ice%20cream%20custard%20cooking.jpg

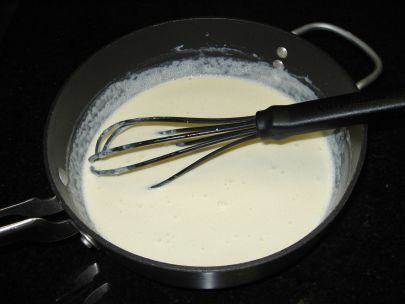
Pour the mixture back into the pan and heat it slowly until thickened, stirring constantly (until it looks like very liquid pudding). Do NOT let this come to a boil (see “scrambled egg” warning above).

Here’s the egg/sugar/milk mixture, once it’s reached the right consistency:
ice%20cream%20custard%20cooked.jpg

Remove from heat and let the custard cool to room temperature. Stir in the whipping cream and vanilla.

Here’s the custard, after adding the cream and vanilla:
ice%20cream%20after%20adding%20cream%20and%20vanilla.jpg

Pour custard into a Tupperware-type container and chill until thoroughly cooled. Freeze in your ice cream maker, following the manufacturer directions. Top with your favorite crushed candy bar, toasted nuts, etc.

If you happen to feel like getting REALLY fancy (and happen to have an extra $2 or so on hand to buy a vanilla bean), you can cut 1 whole vanilla bean in half, then cut it open (lengthwise) and add it to your custard right before cooking it (after mixing the milk and the eggs/sugar). Let the vanilla bean sit in the custard as it cools. OMIT the vanilla extract if you do this. Right before freezing, remove the vanilla bean and scrape out all of the tiny seeds inside, discarding the outer bean pod afterwards. Then you’ll have “Vanilla Bean” ice cream, with the authentic little vanilla specks. This is Hubby’s favorite.

NOTE on sugar: I like to use organic cane sugar for most recipes. It’s organic, first of all, but it also has a richer, molasses/brown sugar taste, because it’s unrefined. It is darker and does have larger granules, though, so I wouldn’t recommend it for any recipe where the sugar doesn’t really have a chance to be heated/cooked enough to dissolve well. I would NOT use it for things like: meringue, sweetened whipped (Chantilly) cream or rimming a cocktail glass. You need finer, whiter sugar for that. But, I do love the cane sugar flavor for cookies, muffins, custards, adding to hot beverages, etc.

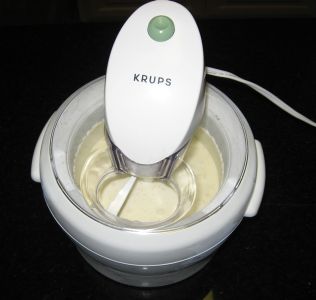
Here’s the ice cream, freezing in the machine:
ice%20cream%20in%20freezer.jpg

Speaking of ice cream makers, have any of you ever used one of these?
I’m thinking of getting one for a friend’s children for Christmas. It looks like it would be really fun, even though it only makes a little bit of ice cream at a time.

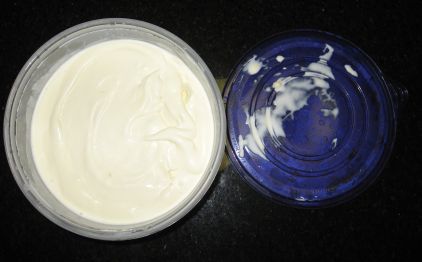
Here’s the finished ice cream, in a storage container to finish freezing to serving consistency:
finished%20ice%20cream%20in%20storage%20container.jpg

Here it is, ready for serving, with the candy inside. Boy and Hubby put Reese’s in theirs, Girl chose a Crunch bar. The ice cream was still a little soft, but gets a little “harder” after it has been in the fridge overnight.
IMG_1669.JPG