Chorizo and Mushroom Fideua (fideos)

I used this recipe from epicurious for dinner tonight. I was trying to prepare the recipe exactly according to the directions, but ended up having to adapt it because I didn’t realize that there was a difference between Spanish chorizo and Mexican chorizo. Apparently, Spanish chorizo is already cooked and is more solid when its … Continue reading “Chorizo and Mushroom Fideua (fideos)”

IMG_5161.jpg

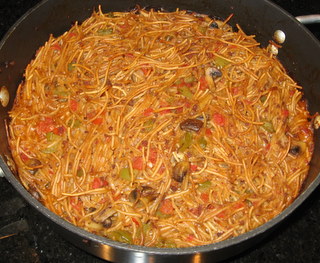
I used this recipe from epicurious for dinner tonight. I was trying to prepare the recipe exactly according to the directions, but ended up having to adapt it because I didn’t realize that there was a difference between Spanish chorizo and Mexican chorizo. Apparently, Spanish chorizo is already cooked and is more solid when its done, so that it can be chopped or sliced. Mexican chorizo is much more “loose”, so I ended up grilling it, then just squeezing it out of the casing and directly into the onion/pepper/mushroom mixture. The chorizo was already pretty heavily seasoned, so I left out the cayenne and paprika, but added about 1/2 tsp of dried oregano, because I like it. The fact that they were not obvious “chunks” or slices of the sausage probably turned out to be a good thing. The chorizo was just kind of incorporated into the sauce, so it was pretty subtle. I used a package of chorizo that had three “links” in it.

Also, the fideos that I used (27 cents per box – you can’t beat that!) came in a 5 ounce box (so I had three 5-ounce boxes, or 15 ounces) and I just couldn’t bear to throw away the extra 3 ounces for no good reason, so I just mixed it all in and added about 6 ounces of extra chicken stock. I was getting tired tonight and the kids were getting pretty hungry by the time this was ready, so I forgot the parsley at the end, but it would have been a nice addition. Cilantro would have been good, too.

IMG_5159.jpg
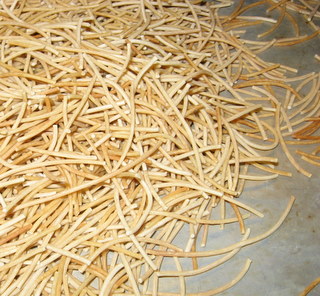
I also toasted the fideos before I added them to the sauce. 375 degrees for about 10 minutes, but watch them closely…

IMG_5160.jpg
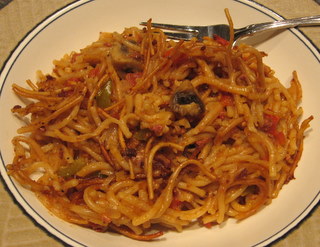
The bottom of the fideos got all nicely toasted and crunchy. It’s funny how some of the strands of fideos ended up really small and crispy, while the ones in the middle absorbed all the liquid and were nice and fat and juicy. It was like spaghetti with nice little crispy bits. The kids liked this really well and even tried some of the mushrooms.

Fresh Tomato Pie, for SERIOUS fresh tomato lovers only

This is a summer staple at our house. Like gazpacho, we wait all year for beautiful, ripe, juicy local tomatoes so that we can make this recipe. My best friend, E, gave me the recipe for the original version of this dish, but I have adapted it quite a bit, so I’ll just give you … Continue reading “Fresh Tomato Pie, for SERIOUS fresh tomato lovers only”

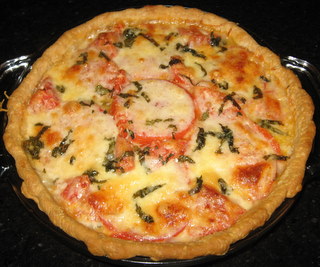
This is a summer staple at our house. Like gazpacho, we wait all year for beautiful, ripe, juicy local tomatoes so that we can make this recipe. My best friend, E, gave me the recipe for the original version of this dish, but I have adapted it quite a bit, so I’ll just give you my version here. This absolutely must be made with fresh, ripe (but not over-ripe or TOO juicy) tomatoes. This dish is worth a visit to a farm or farmer’s market to get them.

IMG_5136.jpg

Fresh Tomato Pie
(We have a tendency to call this ‘Mater Pie, since my farmer mother-in-law calls potatoes “taters” and tomatoes “maters”, but that looks really funny to me now that Boy and Girl are learning Latin.)

1/2 package refrigerated pie crust
(one of the two crusts that come in the package)
2 cups shredded mozzarella cheese
1/4 cup fresh basil chiffonade
about 5 fresh, ripe but firm, medium-sized tomatoes, sliced into 1/2 inch rounds
(discard stem and bottom ends or chop up and reserve for another use)
about 2 Tbsp olive oil (or an olive oil spray)
kosher salt (about 1/4 to 1/2 tsp?) and freshly ground pepper (about 1/4 tsp?)

Preheat oven to 400 degrees.

Fit piecrust into a 9 inch glass pie plate. Fold edges over top edge of pie plate (make a decorative edge, if desired – there are some ideas on the pie crust package). Prick dough all over (sides and bottom) with a fork. Bake at 400 for 5 minutes.

Remove crust from oven and spray it lightly with the olive oil (or brush on a light coating). Sprinkle about 1 cup of the cheese onto the crust. Arrange a layer of tomato slices on top of the cheese, cutting some rounds into pieces, if necessary, to fill in any “gaps” and form one solid layer. Sprinkle lightly with half of the salt and half of the pepper. Spray (or brush) with another tiny bit of olive oil. Top with 1 Tbsp. of the basil and then another 1/2 cup of cheese. Repeat one more layer of tomatoes, salt, pepper, olive oil, 1 Tbsp of basil and then the remaining cheese. Top with 1 more Tbsp of basil and set the remaining 1 Tbsp aside for later. Place pie on a cookie sheet on a lower rack in the oven. Bake at 400 degrees, uncovered, for 35 to 40 minutes. Remove pie from the oven when the tomatoes are bubbling up and the crust and cheese topping are nicely browned. Let stand for 5 minutes before serving, using paper towels to VERY gently blot up any excess juice that bubbles to the surface while the pie is standing. Before serving, sprinkle with remaining 1 Tbsp of basil.

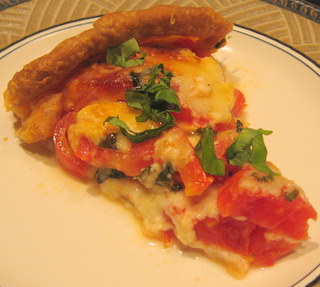
After removing the first slice, I will usually tilt the pie (put a dishtowel under one end of the dish) so that the excess juices (there will be lots of them) will drip into the empty space, and then I’ll put a folded paper towel there to collect them. The crust will easily get soggy if it’s allowed to sit in the excess tomato juices. The leftovers of this pie will MAYBE keep for one day in the refrigerator, but it is VASTLY better if it’s eaten while it’s still warm. It’s great as a brunch or lunch dish and can even stand up as a light summer entree, if you pair it with a light salad or green vegetable.

IMG_5137.jpg

My other mother-in-law (it’s a long story…) adds a layer of caramelized onions when she makes this pie. It is definitely a recipe that could be adapted in lots of different ways (corn/cilantro/black bean, fresh oregano/feta, etc.).

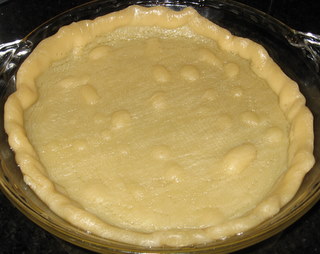
Beware – it is NOT necessary to grease the pie pan before placing the dough in it. If you forget this and grease it, anyway, the dough will slide down and this will happen:

IMG_5127.jpg

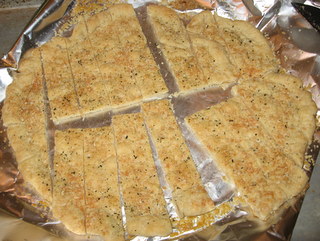
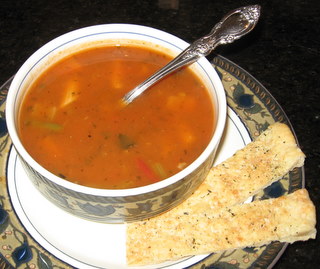
All is not lost, however. You can gently lift the gooey dough out of the pie pan and onto a foil-lined baking sheet, sprinkle it lightly with salt, pepper, grated Parmesan, garlic powder and Italian Herb Seasoning and bake it at 400 degrees for about 10 minutes and then slice it into strips for a garlic-cheesy toast stick that is a great with a bowl of soup.

IMG_5128.jpg

IMG_5129.jpg

Thank goodness those pie crusts come two in a package!

Chicken Curry

This was VERY easy, quick and tasty and was a big hit with both Boy and Girl. This dish has definitely earned a spot in our permanent rotation. It’s not an “authentic” curry, but it super kid-friendly. I actually have a wonderful curry recipe from an Indian co-worker of Hubby’s. It has just the right … Continue reading “Chicken Curry”

This was VERY easy, quick and tasty and was a big hit with both Boy and Girl.
This dish has definitely earned a spot in our permanent rotation. It’s not an “authentic” curry, but it super kid-friendly. I actually have a wonderful curry recipe from an Indian co-worker of Hubby’s. It has just the right amount of spice and is delicious, but more labor-intensive and much less kid-friendly than this version. I should have made that while the kids were at camp – DRAT.

IMG_5063.jpg
It’s not a terribly picturesque dish, but it was delicious.

I started out with this recipe from Family Fun magazine, but adapted it a little.

NB: About 2 cups of rice (uncooked) is the right amount to prepare to go with this.

– I used fresh, seeded and chopped tomato (1 cup) instead of canned and added them after cooking the onions, but before adding the other ingredients, so that they could soften a little.
– I added some chicken stock to the sauce (I had some left over from what I used to cook the accompanying rice).
– I pureed the sauce before adding the chicken because I knew that Boy would not be a fan of visible chunks of tomato.
– I browned the pieces of chicken separately a little bit before adding them to the sauce.

The next time that I make this, I will add a little bit more curry powder and will add more spinach.

Sausage and Peppers with Polenta

Well…we’ve had some schedule changes this week. Our dinner plans for tonight were postponed because my grandfather wasn’t feeling well (I hope you are better soon, Pappaw – I love you!) and so I decided to go ahead and cook Sunday’s menu for us tonight, since I already had all of the ingredients on hand. … Continue reading “Sausage and Peppers with Polenta”

Well…we’ve had some schedule changes this week. Our dinner plans for tonight were postponed because my grandfather wasn’t feeling well (I hope you are better soon, Pappaw – I love you!) and so I decided to go ahead and cook Sunday’s menu for us tonight, since I already had all of the ingredients on hand. I’m glad that I did, because the sausage was a little spicier than I thought it would be and I think it might have been a little bit much for Girl and Boy. Also, the matinee show that we were going to see on Sunday is sold out, so we’re going to see it Monday night, instead, which probably means that I won’t cook Monday night, so we’ll be shifting a bit this week, anyway.

So, this recipe was my “inspiration”, but I adapted it A LOT.

Here’s my version:

IMG_5036.jpg

Sausage and Peppers with Polenta

NOTE: Advance preparation (one day ahead) required.

3 1/3 cups polenta
1 box chicken stock (4 1/2 cups?)
1/4 tsp salt
about 1 cup freshly grated Parmesan cheese, divided
2 packages chicken sausage (I used one Chicken-Mushroom and one Chicken-Spinach-Feta), sliced on a slight diagonal, into “rounds”
2 red bell peppers, sliced into medium strips (1/2 inch thick?)
1/2 red onion, very thinly sliced
3 – 4 garlic cloves, minced or pressed
approximately 1/4 cup olive oil
1/4 tsp dried thyme leaves
olive oil

Pour 2/3 cup of the chicken stock into a small container and set aside. Lightly grease a bread pan (I think mine is 9 X 5?). Bring the rest of the stock to a simmer in a medium-sized saucepan. Add the salt and then pour in the polenta, in a slow, steady stream, stirring constantly. Lower the heat and cook until the polenta is thickened and is pulling away from the sides of the pan. Gently stir in 3 Tbsp of the Parmesan cheese and then pour the polenta into the bread pan. Refrigerate until solid (overnight?).

Preheat oven to 400 degrees. Remove the polenta from the refrigerator and unmold it onto a cutting board. Cut the polenta crosswise into slices about 3/4 inch thick and then cut each slice in half from top to bottom, forming small “planks”.

Saute the sausage coins in a large saute pan with a little olive oil, turning once to brown evenly on both sides. When all of the sausage slices are lightly browned, remove them from the pan (reserving the oil in the pan) and place them in a large ovenproof dish (something that would hold about the same amount as a 9 X 13 pan – shape doesn’t matter – whatever you’ve got that’s about that size is fine) and set aside. Saute the onions over medium-low heat in the same pan that you cooked the sausage in until they’re thoroughly softened and started to lightly brown/caramelize. Pour them in the baking dish over the sausage, still reserving the oil in the saute pan and adding more olive oil, if necessary. Saute the peppers in the pan until they’re lightly softened (cook them to your desired doneness – some people like them to still be a little crunchy, but some people like them completely soft and starting to brown) and then add the garlic and cook for about 1 minute, until the garlic is softened but not browning. Add the peppers and garlic to the baking dish. Sprinkle the sausage mixture with the thyme and then pour over the reserved chicken stock. Season with salt and pepper, if necessary (the sausage that I used had a LOT of both salt and pepper, so it didn’t need any additional seasoning). Place in the oven to re-warm/meld.

While the sausage mixture bakes, heat some more olive oil (just enough to coat the bottom of the pan) to medium-high heat and saute the polenta planks, turning once, until they are warmed through and lightly browned on both sides.

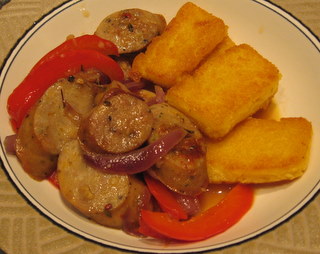
When the polenta is all cooked, remove the sausage from the oven and serve in wide, shallow bowls. Spoon a bit of the pan drippings over each serving and add a few polenta planks to the size. Sprinkle each portion with some of the reserved Parmesan cheese.

This is definitely “make your guy happy” food.

Pasta Carbonara with Peas (for 2)

OK, so I lied. In the course of going through all of my cooking magazines and recipes, I got inspired and made dinner tonight, after all. It was simple, though, and super fast. We will definitely have this again, when the kids are home. I didn’t do a great job of tossing the pasta quickly … Continue reading “Pasta Carbonara with Peas (for 2)”

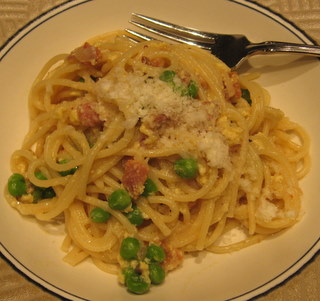
OK, so I lied. In the course of going through all of my cooking magazines and recipes, I got inspired and made dinner tonight, after all. It was simple, though, and super fast. We will definitely have this again, when the kids are home. I didn’t do a great job of tossing the pasta quickly enough when I added the eggs, so I did get a little bit of egg “curdling”, but this was still quite a success.

IMG_5024.jpg

Pasta Carbonara with Peas
adapted from a recipe in Fine Cooking magazine

2 very generous servings

1 Tbsp. olive oil
4 slices bacon, cut into small shreds
1/2 cup minced red onion
1 garlic clove, minced or pressed
2 large eggs
8 ounces (1/2 lb) spaghetti noodles, uncooked
1/2 cup plus 2 Tbsp. fresh grated Parmesan cheese
1 cup frozen green peas
small pinch of dried oregano leaves, optional
Kosher salt and fresh ground pepper to taste

Bring a large pot of salted water to a boil over high heat. Cook peas in a small microwaveable container, covered with water, in the microwave, for about 1 1/2 to 2 minutes, or until completely thawed but not hot. Drain and set aside.

Heat the olive oil in a large skillet over medium heat. Add the bacon and cook, stirring frequently, until bacon is golden and starting to crispen (about 5 minutes). Lower the heat slightly, if necessary. While the bacon is cooking, add the spaghetti to the boiling water and cook until just barely underdone. Add the onion and cook about 5 more minutes, until the onion is softened and the bacon is starting to crisp. Add the garlic and cook 30 seconds more, stirring frequently and scraping up any browned bits on the bottom of the pan. Remove pan from heat and set aside until spaghetti is done.

When spaghetti is almost al dente, drain it, reserving at least 1 cup of the cooking water. Do not rinse it. Add the spaghetti to the onion/bacon mixture in the skillet. Cook pasta mixture over medium heat, tossing with tons to coat the pasta with the bacon fat and finish cooking the pasta, adding a little of the cooking liquid, if necessary, to keep the pasta from sticking to the bottom of the pan. After cooking for about 1 minute, remove the pan from heat. Add a little more cooking water and then add the eggs to the pan, tossing immediately and frequently to coat the hot pasta with the eggs. It’s really important to move FAST here, or you will end up with scrambled eggs in your pasta. Toss for about 1 minute, until the eggs have thickened and coated the pasta. Add a little more pasta water, if necessary. Toss in 1/2 cup of the cheese, oregano and peas. Season generously with pepper to taste. Season with salt, if necessary (it may not be, depending upon how salty your bacon is). Serve immediately, sprinkling each portion with 1 Tbsp. of the remaining Parmesan.

Herbed Chicken Meatloaf

I thought that this recipe, from May 2008 Southern Living, looked intriguing, but I must admit that I was a little apprehensive – chicken meat loaf? The recipe was really easy. I did use fresh onion/celery/pepper instead of frozen and I like to use my own Greek Seasoning blend, but other than that, I was … Continue reading “Herbed Chicken Meatloaf”

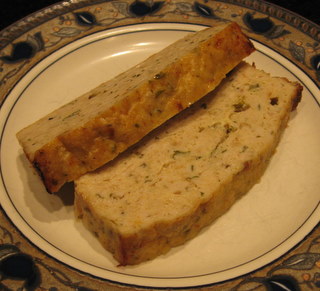
IMG_4997-1.jpg

I thought that this recipe, from May 2008 Southern Living, looked intriguing, but I must admit that I was a little apprehensive – chicken meat loaf?

The recipe was really easy. I did use fresh onion/celery/pepper instead of frozen and I like to use my own Greek Seasoning blend, but other than that, I was pretty true to the recipe instructions.

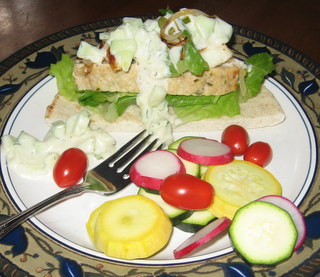
We ate this on top of pitas, with tzatziki, grilled halloumi and a variety of fresh veggies and caramelized onions to “customize” with. I bought some weird pitas this time, that wouldn’t “open”, so we couldn’t stuff them, but they were good this way.

IMG_5002.jpg

Overall, I wouldn’t give the meatloaf rave reviews. It tasted OK, but it was just a bit unappetizing. I think that boneless, skinless chicken thighs sprinkled with the same Greek seasoning and then grilled would be good and if you served it with some grilled onions and peppers, it would taste very similar. I wasn’t crazy about the mayonnaise flavor in this recipe – it was almost like chicken salad that had been baked. Not awful, but not a home run, either.

Adobo Chicken Casserole

This recipe is from Whole Foods Market (it was published in the Austin American-Statesman years ago, but I can’t find a link online anywhere). It is much less complicated than it looks. It does, however, take some planning and preparation. I usually soak the beans and ancho chiles overnight. The next day, I make the … Continue reading “Adobo Chicken Casserole”

This recipe is from Whole Foods Market (it was published in the Austin American-Statesman years ago, but I can’t find a link online anywhere). It is much less complicated than it looks. It does, however, take some planning and preparation. I usually soak the beans and ancho chiles overnight. The next day, I make the Adobo Sauce and prepare the Black Bean Salad. The next day, I cook the chicken and assemble and bake the casserole. It sounds like a lot, but it actually doesn’t take too long. If you have the time, it can definitely be done all on one day, but I just find it easier to do a little at a time, when I’m in the kitchen working on something else, already. If you’re from Texas and are familiar with “King Ranch Casserole”, this is a sort of gourmet version. It’s kind of like a Mexican lasagna: tortillas instead of noodles, cheddar/jack instead of ricotta, black beans instead of spinach and smoky adobo-tomato sauce instead of herby tomato sauce. Whether or not this is a kid-friendly recipe will depend upon the kids, but if they like black beans and don’t balk at tomato sauce, it’s worth a try. If you’re concerned about the level of “heat”, (which actually isn’t too hot), you could leave out the jalapeno. This is great served with a cool, crisp salad. Hubby, Boy and I liked it a lot (Girl was away from home at dinnertime last night for a birthday party). Very yummy and the leftovers freeze well, too.
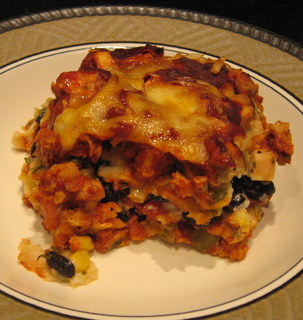
IMG_4995-2.jpg

Adobo Casserole

1 recipe Adobo sauce
1 recipe Chicken Mixture
2 dozen corn tortillas
2 1/4 cup grated Cheddar cheese
2 1/4 cup grated Jack cheese
1 recipe Black Bean Salad

Adobo Sauce:
2 ancho chiles, soaked to soften, seeded, sliced
6 cups tomato sauce
1 cup diced yellow onion
2 Tbsp. canola oil
1 Tbsp. chili powder
1 1/2 tsp. cumin
1 1/2 tsp. oregano
1/8 tsp. cayenne pepper
1/8 tsp. salt
1/8 tsp. black pepper

Chicken Mixture:
2 pounds cooked chicken, finely chopped
1/2 tsp. paprika
1/2 tsp. cumin
1/2 tsp. minced garlic
1/2 tsp. black pepper
2 Tbsp. chopped cilantro

Black Bean Salad:
2 cups cooked black beans
(I cook mine with a little epazote, to help with digestion. 2 cups dried beans will yield about 5 cups cooked beans.)
1/2 cup diced green bell pepper
1/2 cup corn kernels
1 1/2 tsp. chopped cilantro
1/2 cup diced fresh tomato
1 jalapeno, minced
2 Tbsp. freshly squeezed lemon (or lime) juice

Prepare Adobo Sauce:
Heat oil in large skillet or pot over medium heat. Add ancho chiles and onion and saute until tender. Add tomato sauce, chili powder, cumin, oregano, cayenne pepper, salt and black pepper and simmer 10 – 15 minutes. Set aside.

Prepare Chicken Mixture:
In mixing bowl, combine cooked chicken, paprika, cumin, garlic, black pepper and cilantro. Stir to mix well and set aside.

Prepare Black Bean Salad:
In large mixing bowl, combine black beans, green bell pepper, corn, cilantro, tomato, jalapeno and lemon or lime juice. Stir to blend and set aside.
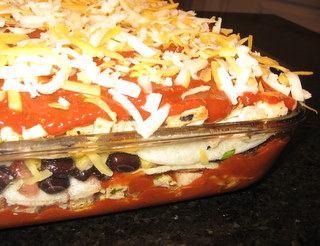
IMG_4992-1.jpg
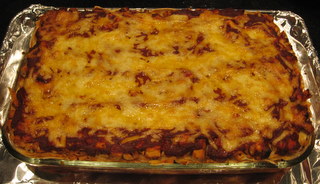
Assembled casserole, ready to be baked. It can be refrigerated, at this point, until you’re ready to bake it, for up to 24 hours. Cover with plastic wrap or foil to refrigerate, but remove it before baking.

Assembling Adobo Casserole:
Preheat oven to 350 degrees. Spread 1/3 of the Adobo Sauce over the bottom of a 9 X 12 inch casserole dish. Cover with 8 tortillas, 1/2 of the Chicken Mixture, 3/4 cup cheddar cheese and 3/4 cup jack cheese. Spread another 1/3 of the Adobo Sauce over the cheese, cover with 8 tortillas, the Black Bean Salad and 3/4 cup cheddar and 3/4 cup jack cheese. Finish with remaining tortillas, Chicken Mixture, Adobo Sauce and cheeses. Bake in a preheated 350 degree oven for 45 – 55 minutes. Let sit for a few minutes before cutting.

Makes 10 – 12 servings.
IMG_4994-1.jpg
Finished casserole, before being cut.
Coconut-Crusted Chicken Tenders

Coconut-Crusted Chicken Tenders adapted from Cooking Light magazine (April 2008) 1 package chicken tenders (I don’t remember how many pounds – maybe a little over 1 pound? – my package was, but it had about 16 tenders in it) 1 1/2 cups fat-free buttermilk all-purpose flour (about 1 1/2 or 2 cups) 3 large eggs, … Continue reading “Coconut-Crusted Chicken Tenders”

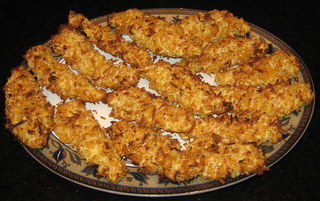
IMG_4989.jpg

Coconut-Crusted Chicken Tenders

adapted from Cooking Light magazine (April 2008)

1 package chicken tenders
(I don’t remember how many pounds – maybe a little over 1 pound? – my package was, but it had about 16 tenders in it)
1 1/2 cups fat-free buttermilk
all-purpose flour (about 1 1/2 or 2 cups)
3 large eggs, lightly beaten
1 1/2 cups crushed cornflakes
1 1/2 cups flaked sweetened coconut
2 tsp. garlic powder
1 1/2 tsp salt
1 tsp curry powder
1/2 tsp cayenne pepper
Cooking spray

Put chicken in a lidded resealable plastic container or plastic bag. Pour buttermilk over the chicken and refrigerate for 1 hour. After 1 hour, pour off the buttermilk and discard it.

Place the flour in a shallow bowl. Place the eggs in another shallow bowl. Combine coconut, cornflakes, garlic powder, salt, curry powder and cayenne and place in another shallow bowl.

Preheat oven to 375 degrees. Spray a large cookie sheet with cooking spray (olive or canola) and place it in the oven.

Roll all of the chicken tenders in the flour, one at a time, and set them aside on a large plate, platter (or use a second cookie sheet).

One at a time, dip each flour-coated chicken tender into the egg and then into the cornflake/coconut mixture, turning to coat well. As you finish each tender, set it aside on the platter or baking sheet until they are all coated.

Remove the preheated baking sheet from the oven and carefully place the chicken tenders on it. Spray the tenders lightly with cooking spray. Bake for about 20 minutes, turning over halfway through the cooking time.

These were DELICIOUS and a big hit with all of us. Girl said that they were a little bit spicy, but they’re really aren’t hot so much as flavorful. If you are concerned about the amount of spice for your family, just cut back the cayenne and curry a tiny bit. I am going to try to come up with some sort of dipping sauce for them the next time that I make them. This recipe would be GREAT made with butterflied shrimp, instead of chicken, but shellfish doesn’t fly with Hubby. Maybe sometime when Hubby and Girl are both out of the house…

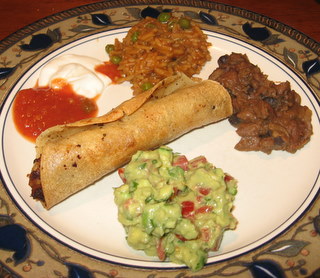
Guy Fieri’s Taquitos

One of the things that I made while on my blogging hiatus. The recipe can be found here: Guy Fieri’s No Can Beato This Taquito The recipe is pretty labor intensive (lots of different preparatory and assembly steps), but they are awfully tasty. These were a bit hit with the kiddos and could easily be … Continue reading “Guy Fieri’s Taquitos”

IMG_4393.jpg

One of the things that I made while on my blogging hiatus. The recipe can be found here:
Guy Fieri’s No Can Beato This Taquito

The recipe is pretty labor intensive (lots of different preparatory and assembly steps), but they are awfully tasty. These were a bit hit with the kiddos and could easily be adapted to suit your taste, (your kids don’t like red peppers? just leave ’em out!) once you learn the technique (similar to making enchiladas). Next time, I’m going to have the kids help me roll ’em up.

Guy’s show is really entertaining to watch. He’s like a male version of Sandra Lee (I think). His set is very thoughtfully decorated and each show includes a cocktail. Of course, his set is decorated with a pool table, full-on bar, large flat screen TV and a couple of loafing friends, but still….thought has been put in.

Chicken Reggiano (Parmigiano Crusted)

2 boneless, skinless chicken breasts pinch of salt 1/4 cup all-purpose flour 1 egg, lightly beaten (or 2 egg whites, if you’re trying to be virtuous) 1 and 1/2 cups freshly grated Parmigiano-Reggiano cheese 1/2 cup olive or canola oil Place the egg, flour and cheese into 3 separate small, shallow bowls. Cut each chicken … Continue reading “Chicken Reggiano (Parmigiano Crusted)”

IMG_4389.jpg

2 boneless, skinless chicken breasts
pinch of salt
1/4 cup all-purpose flour
1 egg, lightly beaten (or 2 egg whites, if you’re trying to be virtuous)
1 and 1/2 cups freshly grated Parmigiano-Reggiano cheese
1/2 cup olive or canola oil

Place the egg, flour and cheese into 3 separate small, shallow bowls. Cut each chicken breast into two pieces. Gently pound each piece of chicken with the flat side of a mallet until it is a uniform thickness. Sprinkle salt lightly over each of the (now 4) pieces. One at a time, dredge each piece of chicken in the flour until lightly coated, then in the egg until it’s covered and then, lastly, into the cheese, patting the cheese gently into the chicken until thoroughly coated. Set aside on a plate.

Heat the oil in a large, flat-bottomed pan over medium to medium-high heat. Add the chicken breasts and cook until completely browned. Turn over and cook on the other side until cheese has crusted and chicken is cooked through. BEWARE: This chicken has a tendency to stick pretty badly to the bottom of the pan. Make sure that you have a good layer of oil and that the pan is hot enough. Be patient as you try to turn it: the cheese will stick when it first starts to cook and melt, but as it crusts over and gets more done, it will start to release.

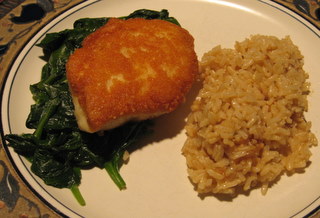
I served this over a bed of sauteed spinach, with some buttered, herbed (mixed in Italian seasoning) brown rice on the side.

This was a BIG hit with all of us and will definitely earn a place in the regular rotation.