Balsamic-Glazed Pecan and Stilton Bites

OK, all of you BCW Gourmet Clubbers that are stopping by – please leave me a comment to let me know what you think! That was a great party, huh? Does anyone have the Orange-Chipotle Pork recipe that they would be willing to share? That was scrumptious! NOTE: I’m going to be entering the photo … Continue reading “Balsamic-Glazed Pecan and Stilton Bites”

OK, all of you BCW Gourmet Clubbers that are stopping by – please leave me a comment to let me know what you think! That was a great party, huh? Does anyone have the Orange-Chipotle Pork recipe that they would be willing to share? That was scrumptious!

IMG_4001.jpg
NOTE: I’m going to be entering the photo above in the monthly CLICK photography contest. Wish me luck!

This recipe is adapted from one in the great little appetizer cookbook, Cocktail Food: 50 Finger Foods with Attitude (they are called “Nutty Napoleons” in the book and are made with dry-toasted pecans, instead of the balsamic glazed ones). I don’t remember where I originally saw the instructions for the balsamic-glazed pecans, but they were served over a spinach salad (with balsamic vinaigrette). I thought these two recipes would be great, if they were combined together. We are heading to a neighborhood party this evening and each couple is asked to bring an appetizer. I thought that these would be fun and festive.

Balsamic-Glazed Pecan and Stilton Bites

6 cups very large and perfect pecan halves, divided
1 and 1/2 cups brown sugar, divided
6 Tbsp. olive oil, divided
6 Tbsp. balsamic vinegar, divided
salt

8 ounces cream cheese, at room temperature
6 ounces Stilton cheese, at room temperature
6 tsp. port wine
1 1/2 tsp. honey
1/4 tsp fresh ground black pepper
chopped fresh chives, for garnishing (about 6 Tbsp.)

Line a large cookie sheet with foil. Spray the foil lightly with cooking spray and set it aside.

NOTE:
I prepared the pecans in 3 separate batches, with 2 cups pecans, 2 Tbsp. oil, 2 Tbsp. vinegar, 1/2 cup brown sugar and a pinch of salt in each one. It MIGHT work if you cook all 6 cups of pecans (and all of the other ingredients) at once, but I haven’t tried it, so I can’t vouch for it, for sure (don’t know if the pecans would toast evenly, etc.). If you’re going to do all 6 cups at once, you’ll need more than one foil-lined baking sheet.

Whisk the oil, vinegar, sugar and salt in a large, heavy skillet over medium heat until bubbly. Add pecans and cook until glaze is dark and thick and pecans are well toasted, stirring frequently and being careful not to burn the pecans (about 5 – 7 minutes). Remove pan from heat and pour pecans onto foil-lined baking sheet, gently separating the pecans as much as possible as you pour them, with a wooden spoon or spatula. DO NOT TOUCH THE PECANS WITH YOUR HANDS; they will be scaldingly hot (yes – I learned this the hard way – I have a blister under the tip of my left middle fingernail – ouch). Allow the pecans to cool for at least 10 minutes – you’ll be able to separate them more later.

Blend the cream cheese, Stilton, port, honey and pepper in a food processor until smooth. Transfer to a pastry bag fitted with a # 18 (or similarly-sized) tip. (You can also use a plastic baggie with a corner cut off or a small, round tip.)

Put half of the cooled, separated pecans (flat-side down) on a serving tray. Pipe about 1/4 tsp. of the cheese mixture down the top of the pecan and then top with a second pecan (flat-side down). Pipe an additional 1/4 tsp. of cheese onto the top pecan and sprinkle with chopped chives to garnish.

The glazed pecans can be prepared up to 3 days in advance and stored in an airtight container at room temperature. The cheese mixture can be prepared up to 3 days in advance and refrigerated, but allow to come to room temperature before assembling (pull it out of the fridge about an hour ahead of time).

You can assemble the pecans up to 3 hours ahead and allow to sit at room temperature.

Yield: about 120 bites, depending upon the size of your pecans.

He makes kick-ass omelettes, too…

I am blessed with a Hubby that is very handy and can fix almost anything. He’s saved us thousands of dollars in various repairs and service calls over the years. He’s installed lights, beadboard, tile and a toilet in our current home. He can fix anything that could ever conceivably go wrong with a computer. … Continue reading “He makes kick-ass omelettes, too…”

I am blessed with a Hubby that is very handy and can fix almost anything. He’s saved us thousands of dollars in various repairs and service calls over the years. He’s installed lights, beadboard, tile and a toilet in our current home. He can fix anything that could ever conceivably go wrong with a computer. He always has extra bits and leftover pieces of things from previous projects and can usually fix things without even having to make a hardware store run, because he usually has “just the right” screw, glue, widgit or wire to complete a repair in his little workshop corner of the garage.

A couple of weeks ago, our fancy-dancy, and relatively new, washing machine decided to get snooty on us. It has all kinds of safety and energy-saving features and will do things like stop agitating if the lid is opened or annoyingly drain all of the water if the cycle is stopped unexpectedly. The problem recently, however, was that the sensor/switch that tells the machine whether or not the lid was open was malfunctioning, so it wouldn’t start a wash load because it thought the lid was open, when it was, in fact, NOT. Luckily, my aforementioned Handy Hubby was able to rig up a solution. I don’t ask questions about Hubby’s solutions; I’m just grateful. It’s a little like seeing sausage being made; you’ll be a lot happier about the end result if you don’t know a lot about the process (although I would be very surprised if Hubby’s “fix” had NOT involved duct tape and maybe possibly Gorilla Glue).

As you may have read, we had a laundry CATastrophe recently. Predictably, the washing machine chose the precise moment when it was most needed to do a repeat of its previous snootiness and the lid sensor decided to stop working again. Again, I cajoled Hubby into service. He diligently worked on it for quite some time before announcing that his previous “fix” wasn’t working this time. He said that he would need to order a replacement sensor switch and that it wouldn’t arrive for about 5 days. “5 days?!”, I said. “What will I do with all of urgently-in-need-of-attention laundry???,” I panicked. “Not to worry”, Hubby said, “I’ve got a temporary solution rigged up so that you can wash stuff until the replacement switch arrives from the parts department.”

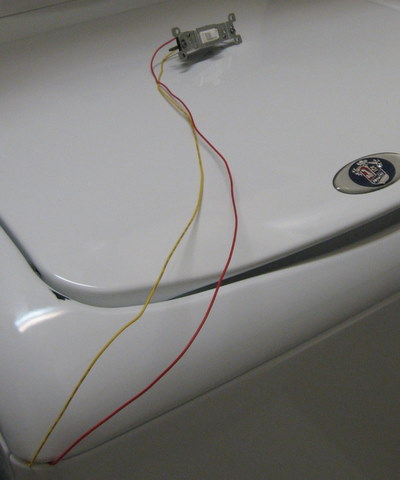
This is what he came up with:
IMG_3992-1.jpg
Standard-issue light switch.

It works perfectly.

A few setbacks…

Well, we reached a roadblock with the cats: when we tried to move forward from “a little litter in the bowl” to “a little water in the bowl”, they rebelled. Or, more specifically, one of them rebelled, we’re not positive which one, but probably this one: Queenie, Persnickety Girl Apparently, our bed was a much … Continue reading “A few setbacks…”

IMG_3985.jpg

Well, we reached a roadblock with the cats: when we tried to move forward from “a little litter in the bowl” to “a little water in the bowl”, they rebelled. Or, more specifically, one of them rebelled, we’re not positive which one, but probably this one:
IMG_3955.jpg
Queenie, Persnickety Girl

Apparently, our bed was a much more appealing toilet than the water-filled bowl and we when we adjourned to the bedroom night-before-last, we were met with a really disgusting sight and I was up a few more hours than I planned, doing the resulting laundry. That was fun.

So, the cats are now quarantined in our bathroom, without access to anything appealing to eliminate in except for the toilet set-up. Don’t worry – our bathroom is very large (we moved the piano in there during a recent remodel, so that the kids could still practice) and their food and water are in there; they’ll be fine.

I’ve been wanting to try this whole toilet-training thing for a long time and this was precisely my fear: that two of them would take to it beautifully and there would be one holdout (I even predicted which one it would be) that wouldn’t figure it out and would require a litterbox. If we have a litterbox in the house, of course, the other two will want to use that, as well, and will no longer opt for the toilet. So, if Miss Priss doesn’t get the hang of this soon, we’re back at Square 1.

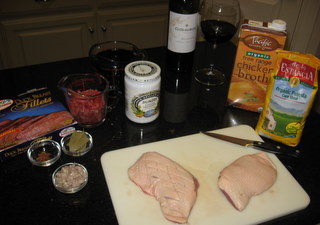
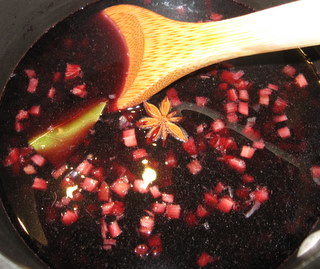
Dinner was also a dismal failure last night. I made (attempted? botched?) this Cooking Light recipe and it was AWFUL. I think that it was more of an execution error on my part than a true recipe defect, but it was definitely a team effort. The duck didn’t have much flavor on its own (was just sprinkled with salt and pepper) and the sauce really wasn’t distinguishable from a regular wine reduction.

IMG_3986.jpg

I expected some more flavor payoff from the semi-exotic ingredients (who keeps rhubarb around? ginger preserves? star anise?), but they just didn’t add much punch to the sauce. I seared the duck beautifully on the outside and the skin was beautifully crispy, but I could tell that it was still undercooked in the middle, so I tried to pop it into the microwave (Gross – I know, I know, but desperate times call for desperate measures…) for just a few seconds to catch the middle up with the lovely outside, and of course, I turned it into a chewy, overcooked, rubbery, disgusting mess. The polenta was fine, but I added a little parmesan to it, which didn’t complement the sweet-ish sauce at all.

IMG_3989.jpg
Kid’s plate, with shaved parmesan on the polenta.
(The kids aren’t into having their foods all mixed together and didn’t want to try the sauce.)

The broccoli (frozen, but organic) was the best thing on the plate.
IMG_3988.jpg
It was a pretty plate (except for the gray-colored duck), but it tasted dreadful.

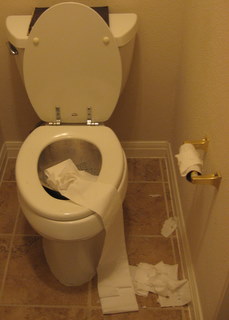
The cats using the TOILET we expected, but not the toilet PAPER!

If you want to try this whole toilet training this at your house, I would suggest taking the roll of toilet paper off of the dispenser to prevent this sort of thing. Also: some of you have expressed concern about dirty cat paws on our toilet seats, but here’s the deal: if they’re not scratching … Continue reading “The cats using the TOILET we expected, but not the toilet PAPER!”

IMG_3960.jpg

IMG_3971.jpg

If you want to try this whole toilet training this at your house, I would suggest taking the roll of toilet paper off of the dispenser to prevent this sort of thing.

Also: some of you have expressed concern about dirty cat paws on our toilet seats, but here’s the deal: if they’re not scratching around in a stinky, nasty litter box, their paws won’t be dirty, right?

And rest assured that MUCH hand washing goes on between the toilet training and the cooking!

Cat Toilet Training Update and Instructions Part 1

OK, this blog is in danger of veering off into a completely different direction, but there does appear to be at least a little interest in the cat toilet training process, so here’s what we’re doing (a day or two for each step, but pay attention to your cat to see if you should go … Continue reading “Cat Toilet Training Update and Instructions Part 1”

OK, this blog is in danger of veering off into a completely different direction, but there does appear to be at least a little interest in the cat toilet training process, so here’s what we’re doing (a day or two for each step, but pay attention to your cat to see if you should go slower or if you can proceed faster):

Step 1: Move the litter box as close to the toilet as possible. Place the toilet with the seat down, but the lid up.
IMG_3972.jpg

Step 2: Raise the litter box up a bit (on something sturdy, so the cat won’t be nervous if it gets wobbly. We used plastic storage boxes from Target). Keep the toilet in the seat down, lid up position.
IMG_3973.jpg

Step 3: Raise the litter box up a little more. Keep the toilet in the seat down, lid up position. At this point, your cat may be jumping onto the toilet seat first and then jumping DOWN into the litter box. This is a good thing. We had problems with our cats attacking the toilet paper at this point, so you might consider removing it.
IMG_3974.jpg

Step 4. Place the litter box ON TOP of the toilet (your cat will figure out that he needs to jump up into it). You can leave a “stepstool” (like a plastic storage container) if you’re worried that your kitty won’t be able to make the jump in one step.
IMG_3975.jpg

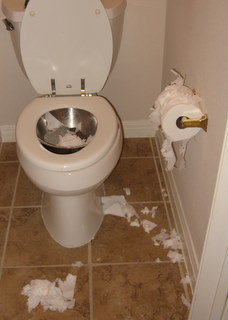
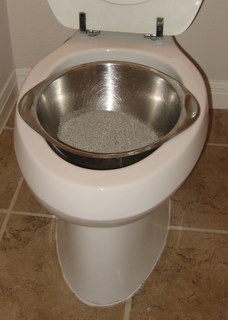
Step 5: Find a metal bowl that will fit inside the toilet and rest it inside.
IMG_3976.jpg
Close the seat over it (leave the lid up) and place a couple of inches of cat litter inside the bowl.
IMG_3979.jpg

Step 6: As your cat/s uses the litter box/toilet/bowl device, scoop out the, umm, product and dispose of it. Don’t refill with fresh litter, but, instead, just allow the litter level in the bowl to gradually go down. The original instructions that I read said that you should try to gently catch your kitty “in the act” and move any paws that are not on the seat (but are, instead, in the bowl) as they are going (to encourage them to eventually “squat” with all four paws on the seat), but we’ve not been able to do that – our cats freak out when we approach them as they’re “going” and will jump down. I’m hoping that they will figure it out on their own when we reach the next step (gradually adding water to the bowl).

(This is the stage where we are with our cats right now, so I’ll leave off for now. Keep an eye out for Part 2 soon). We originally got this technique here (more info, less photos).

Pomegranates

Yeah, yeah, I know….not local, not organic, but these things are a veritable treasure trove of vitamins (B5, C mostly and PACKED with anti-oxidants) and the kids LOVE them. It’s kind of a pain to peel them and remove the seeds, but they are so beautiful that I don’t mind – they look like little, … Continue reading “Pomegranates”

IMG_3980.jpg

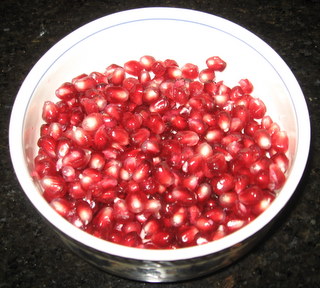
Yeah, yeah, I know….not local, not organic, but these things are a veritable treasure trove of vitamins (B5, C mostly and PACKED with anti-oxidants) and the kids LOVE them. It’s kind of a pain to peel them and remove the seeds, but they are so beautiful that I don’t mind – they look like little, juicy rubies. Mmmmm…

I’ve read about sprinkling them over dishes as a garnish, but haven’t ever done it, myself. I would imagine that they would be pretty fabulous in a very simple (and lightly dressed) salad. Dropping a few of them into the bottom of a glass of champagne is lovely and there are trillions of pomegranate cocktail recipes online. Get ’em while you can – pomegranate season is already waning.

Warren Buffett Blondies (cause they’re THAT RICH)

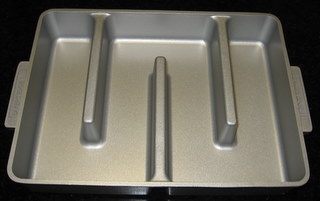
I don’t remember where I initially read about this pan, but I knew when I saw it that I HAD to have one. It allows you to bake lasagna, cookies, brownies, etc. and EVERY PIECE will have at least two sides of chewy, crispy edge (the best part, in my opinion). No more gooey, half-baked … Continue reading “Warren Buffett Blondies (cause they’re THAT RICH)”

IMG_3984.jpg

I don’t remember where I initially read about this pan, but I knew when I saw it that I HAD to have one.
IMG_3962.jpg
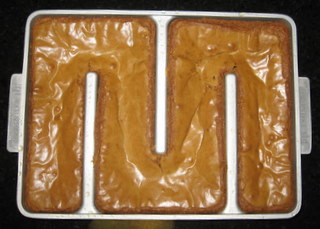
It allows you to bake lasagna, cookies, brownies, etc. and EVERY PIECE will have at least two sides of chewy, crispy edge (the best part, in my opinion). No more gooey, half-baked brownies from the inside of the pan? Sign me up!

I mentioned this pan to Hubby MONTHS ago and apparently (and uncharacteristically), he remembered. A box arrived today, addressed to Hubby and sent from “Bakers Edge”. Poor guy – he was going to try to surprise me and this was supposed to be part of my Christmas present, but the labeling gave him away. Of course, once I saw it, there was NO WAY that I could wait until Christmas to use it. I am NOTORIOUS for finding out about presents. I used to peek before Christmas when I was a kid (really sorry about that Holly Hobbie gazebo, Mom). I’m also AWFUL at keeping secrets (you’ve now been warned: don’t tell me any!), but I’m particularly awful at keeping secrets about gifts. When I was about 5, I told my newly-minted tennis enthusiast uncle that I couldn’t tell him what his birthday gift was, but that they were yellow and came three-to-a-can.

In addition to craving the pan, I’ve been craving Blondie bars (similar to a brownie without chocolate), ever since seeing the new Nancy Drew movie this summer (Nancy uses homemade lemon bars and blondies as bribes to elicit clues and confessions), so last night, when the pan arrived, my mission was clear.

Blondies
(inspired by Nancy Drew and Bakers Edge)

3 sticks butter, unsalted
2 cups light brown sugar, packed
1 cup dark brown sugar, packed
3 cups flour
1 Tbsp. baking powder
3/4 tsp. salt
3 eggs
1 Tbsp. vanilla extract, Mexican

Preheat oven to 325 degrees. Spray Bakers Edge (or 9 X 13) pan generously with cooking spray.

Stir together flour, salt, baking powder and set aside.

Melt butter in a large saucepan over medium heat and then add sugars. Cook butter-sugar mixture until thoroughly combined and bubbly. Set aside to cool for about 2 minutes.

While butter-sugar mixture cools, whisk eggs and vanilla in a large mixing bowl until slightly frothy. Slowly pour butter-sugar mixture into the eggs, whisking constantly (to keep eggs from scrambling – eww!). This is much easier if you have someone to help you: one of you pours, the other whisks. Add the flour mixture and stir to combine. The batter will be VERY thick and caramel-y at this point.

IMG_3964.jpg

Pour the batter into the prepared pan and bake for about 40 minutes or until batter is barely “set” and edges (mmmm….LOTS of them!) are nicely golden brown. They will very likely be a little sunken in the middle of each “row” if you cook them in a Bakers Edge pan – and that’s OK! Let cool, in the pan on a wire rack, for at least 10 minutes before cutting into serving pieces (DO NOT use metal utensils on your Bakers Edge pan).

Makes about 24 (depending upon how you cut them, of course).
You can add chopped nuts, dried fruit, baking chips – or whatever else might strike your fancy, if desired, but additions aren’t necessary – they are plenty good plain.

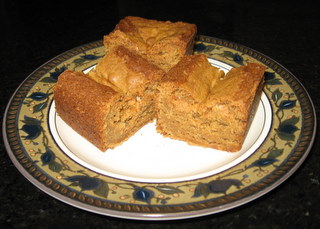
These are AMAZING and make your house smell SINFUL while they’re cooking. I didn’t think that anything could replace Swedish Spice Cookies in my family’s eyes, but these are giving them a run for their money. Imagine if shortbread and caramel had a love child…that’s what they’re like.

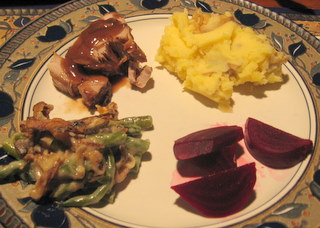
Cranberry Crock Pot Pork Tenderloin, Green Bean Casserole, Beets & Mashed Potatoes

My mother gave me this EASY Crock Pot Pork Tenderloin recipe many years ago. It’s super kid-friendly and very low fat. You can throw it in the Crock Pot and let it cook with you’re out shopping for presents or decorating the Christmas tree. Crock Pot Roast Pork Tenderloin with Cranberry Gravy 1 (two to … Continue reading “Cranberry Crock Pot Pork Tenderloin, Green Bean Casserole, Beets & Mashed Potatoes”

IMG_3939.jpg

My mother gave me this EASY Crock Pot Pork Tenderloin recipe many years ago. It’s super kid-friendly and very low fat. You can throw it in the Crock Pot and let it cook with you’re out shopping for presents or decorating the Christmas tree.


Crock Pot Roast Pork Tenderloin with Cranberry Gravy

1 (two to three pound) pork tenderloin
1 can whole cranberry sauce
1/2 cup cranberry juice (not cranberry juice cocktail)
1/2 cup sugar (I usually cut this just a bit)
1 tsp. dry mustard powder
1/4 tsp. ground cloves
2 Tbsp. cornstarch

Put cranberry sauce, juice, sugar, mustard and cloves in crock pot. Stir with a whisk to thoroughly combine. Add pork tenderloin. Set crock pot to cook for 8 to 10 hours on low setting.

IMG_3929.jpg

When the timer goes off, carefully pull pork loins out of crock pot (leaving sauce) and set aside to rest on a cutting board.

Carefully pour gravy from crock pot into a small saucepan. Add the cornstarch and whisk thoroughly to combine. Cook over medium-low heat until gravy has thickened to serving consistency. If you are serving picky eaters who might be turned off by the whole cranberries, you may puree the gravy with an immersion blender.

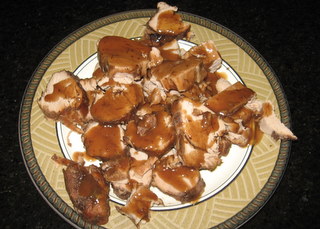
Slice tenderloin (1/2 inch to 3/4 inch thick). Place it on a serving platter and drizzle with the cranberry gravy. Serve the rest of the gravy on the side.

IMG_3938.jpg

Everyone liked this recipe, but it is on the “sweet” side, so you may not care for it if you don’t care for “sweet” meat sauces (Hubby prefers savory/herb/garlic-type dishes). I just found this similar (but maybe less sweet) recipe on Epicurious. I think it might be good, too, and might be possible to adapt for the Crock Pot. I may give it a try sometime soon.

Our brother-in-law, who is a great cook, made a homemade version of the classic Campbell’s green bean casserole for Thanksgiving and I’ve been craving it again ever since, so I decided to try to recreat it for dinner last night.


Homemade French Fried Onions

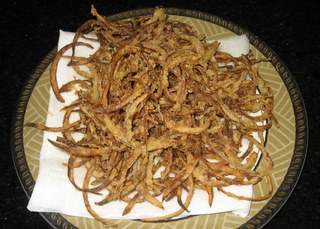
IMG_3930.jpg

about 1 and 1/2 cups VERY thinly sliced red onion
about 1 cup milk
about 1 cup flour with a little salt (1/2 tsp?) mixed in
oil for frying (I used a blend of peanut and canola)

Soak the onions in the milk for about 5 minutes while you eat the oil to about 350 degrees in a deep skillet. Remove the onions from the milk a small handful at a time and dredge, in batches, through the flour to coat. Fry in the oil until onions are golden brown – be careful not to let them burn! Remove from oil and drain on paper towels. Set aside to cool. Try not to nibble too many of them while you assemble the rest of the casserole ingredients.


Homemade Cream of Mushroom Soup

IMG_3934.jpg

1/4 to 1/2 cup butter
1/4 cup flour
1 pound sliced fresh mushrooms
2 cups liquid: milk, chicken stock, cream (or a combination thereof – I used the milk from soaking the onions, plus a little stock and cream)
1/4 to 1/2 tsp. dried thyme leaves
salt and pepper to taste

Saute mushrooms in 1/4 cup of the butter until softened. Remove mushrooms and set aside, leaving butter in the pan. Add the flour and stir to thoroughly combine, adding more butter if necessary to create a smooth, blended roux. Cook the roux over medium heat for 2 to 3 minutes until thickened. Slowly stir in the liquid and continue cooking until well combined and thickened to cream soup consistency. Chop the mushrooms up a little bit and add them back to the soup. Add the thyme and salt and pepper to taste.

Homemade Green Bean Casserole

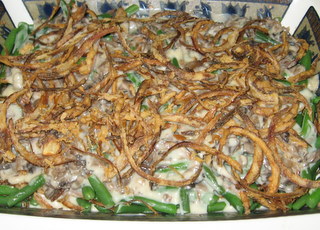
IMG_3937.jpg

One batch Cream of Mushroom Soup
One batch French Fried Onions
2 (10 oz) packages frozen green beans, cooked according to package directions

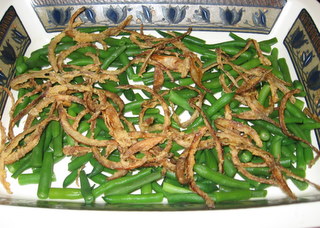
Preheat oven to 350 degrees. Layer half of the green beans in a large rectangular casserole dish. Sprinkle with half of the onions.

IMG_3931.jpg

Layer in the rest of the green beans and then half of the remaining onions. Pour mushroom evenly over the whole casserole and top with the remaining onions.

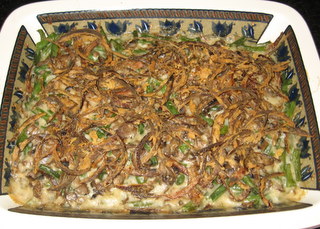
IMG_3936.jpg

Cook for about 30 minutes or until the casserole is heated through and bubbly and the onions on top have browned a bit more.

This recipe was really good, but did have a much stronger mushroom flavor than the canned soup version. Hubby and I loved it, but it wasn’t a great big hit with my mushroom-doubting kiddos. I wouldn’t recommend making this for your kids unless they are mushroom lovers.